Amy Compositions: Top 5 Underrated Troop Combinations for War
25 min read Five off-meta war armies that overperform when scouted well, with builds, spells, and step-by-step plans.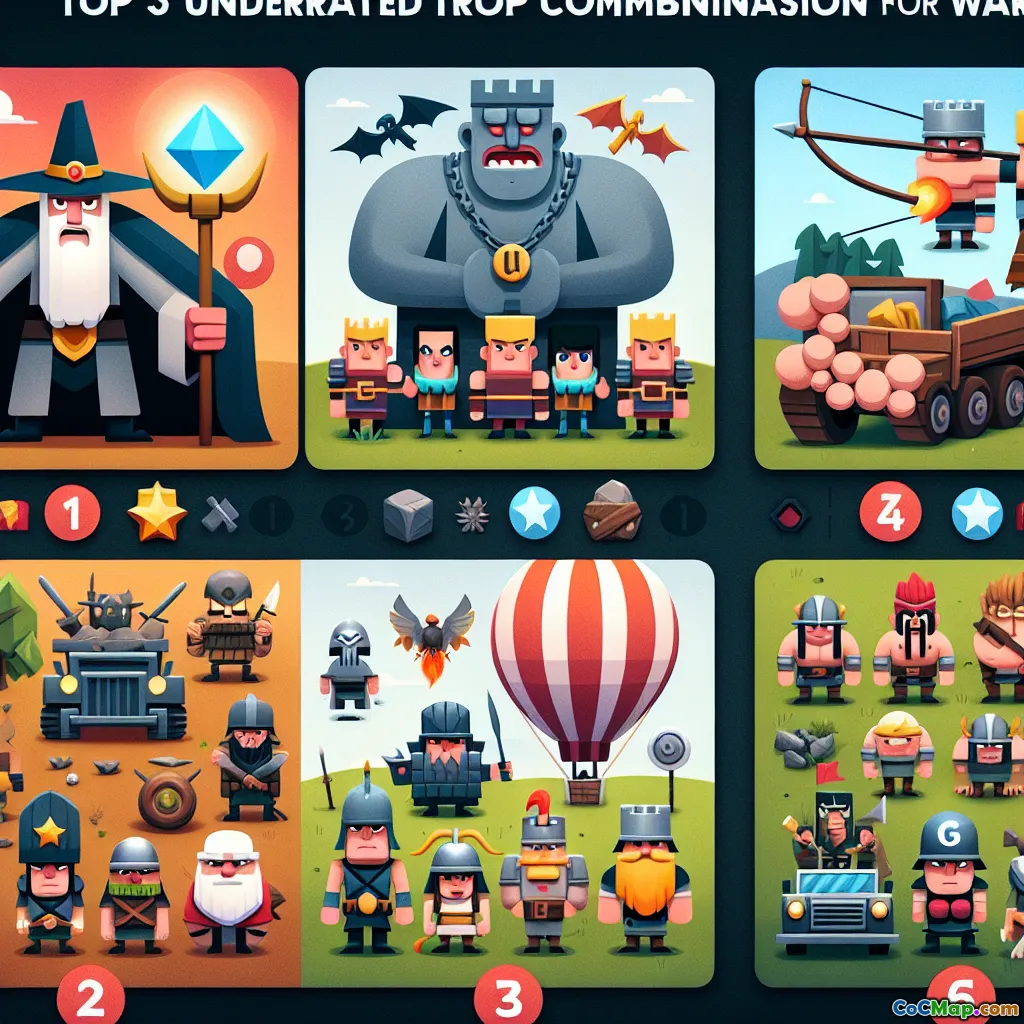
Introduction
What if your next perfect war triple is hiding in an army you have barely tried? In a meta dominated by shiny trends and streamer favorites, a handful of old school or off-brand combinations quietly farm triples against the right bases. They are not flashy, they are not new, and that is exactly why they work: most bases are built to stop what everyone expects.
In this guide, we dive into five underrated army compositions that consistently convert when scouted well. For each, you will get the why, the where, and the how, plus templates, key spell timings, common pitfalls, and Town Hall specific tweaks.
The Shortlist
- Queen Charge Hogs with Flame Flinger
- Sui Heroes into Hogs with Battle Drill
- DragBats with Ice support
- Super Archer Blimp into Dragon Riders
- GoHoBo with Log Launcher
Each comp excels against particular base traits. The secret is not memorizing a script, but identifying the conditions that make them spike in value.
1. Queen Charge Hogs with Flame Flinger
Why it is underrated
- Hybrid gets all the attention, but raw Hogs bring higher burst damage per housing than Miners and end fights faster when pathing is clean.
- Flame Flinger adds free value and trims key defenses, turning a scary core into a highway for your Hogs.
When to pick it
- Bases with spaced compartments and few spring trap clusters on the likely Hog path.
- Arrows point upward when an exposed eagle or scatter can be sniped by the Flinger from a safe angle.
- Queen can get two of the following without dying: enemy Archer Queen, Clan Castle, one scatter, Town Hall, or at least one multi inferno.
Army and spell template
- Troops: 5 Healers, 28 to 32 Hogs, 4 to 6 Wizards, 4 to 6 Headhunters, 1 to 2 Ice Golems, 1 Baby Dragon, 6 to 10 Wall Breakers or a few Super Wall Breakers.
- Spells: 3 Rage, 2 Heal, 2 Freeze, 1 Poison. Adjust a Rage to an Invisibility if the Queen route is trap heavy.
- Siege: Flame Flinger with 8 to 10 Hogs inside or a Yeti plus Valk mix. Stone Slammer is a backup if air defenses are pulled.
Step by step
- Queen funnel and entry. Use a Baby Dragon and a Wizard to create a tight funnel. Open the first layer with Super Wall Breakers under Rage if needed. Rage early on the Queen if she sees heavy x bow or multi fire.
- Flame Flinger value. Drop the Flinger on a long side with no mortar coverage. Aim for the eagle or an isolated scatter. If a ground x bow covers the area, use an Ice Golem and a few Balloons as damage soakers.
- CC control. Poison the pull, Freeze as needed to save the Queen ability. If the Clan Castle holds Ice Golems or Super Minions, consider pausing the Flinger while the Queen stabilizes.
- Hog flood. Once the Queen secures the key target and has a stable lane, send Hogs from the opposite side to pinch the base. Add Headhunters as the enemy heroes come into range.
- Heal windows. Prioritize Heal over giant bomb zones and multi inferno intersections. Use Freeze only to cross a scatter or a high value choke, not on random single target shots.
- Cleanup. Keep two Wizards for back end collectors and a couple of archers for corners. Do not starve the Queen of Healers by dragging them over the Hogs; angle Hogs so they do not steal Healer aggro.
Common pitfalls and fixes
- Flinger dies to mortar or ground x bow: present a Golem or Ice Golem tank for 6 to 8 seconds before placing the Flinger.
- Queen walks the wrong way: anchor a Wizard early and use a small wall break to signal direction.
- Hogs hit 3 giant bombs in a row: stagger deployment in two waves with a Heal between, or path them through a compartment cleared by the Queen.
TH specific tweaks
- TH12 to TH13: fewer multi infernos means 2 Heals often enough; bring 1 extra Freeze for sweeper or scatter resets.
- TH14 to TH16: Rage the Queen more liberally; the base damage is higher. Consider 3 Heals on anti Hog trap maps and run Battle Drill as emergency core opener if the Flinger angle is blocked.
Why it works
- Hogs deliver the fastest defense to defense movement and ignore walls, so once the skeleton of the base is cut, they spiral and delete the core before defenses retarget.
2. Sui Heroes into Hogs with Battle Drill
Why it is underrated
- Players default to Hybrid or full Queen Charges, but a clean hero dive can remove 30 to 40 percent of a base plus both heroes for the price of a couple of spells. Battle Drill adds safe pathing by pre triggering traps and opening compartments exactly where your Hogs would stall.
When to pick it
- Symmetrical or box bases where you can slice out a corner and expose the core.
- Enemy Queen and Royal Champion are accessible from the outside with minimal investment.
- Town Hall can be taken by a Blimp or heroes without compromising the Hog path.
Army and spell template
- Troops: 32 to 36 Hogs, 4 to 6 Headhunters, 1 to 2 Ice Golems, 6 to 8 Wizards, 6 to 8 Wall Breakers or 2 Super Wall Breakers, 1 Baby Dragon.
- Spells: 2 Heal, 2 Freeze, 1 Rage or Invisibility for the hero dive, 1 Poison.
- Siege: Battle Drill with Hogs or Valkyries inside. Pair with a Blimp for Town Hall if needed.
Step by step
- Sui setup. Use Ice Golem plus King and a couple Wizards to carve a corner. The Queen follows to grab a hero and a scatter or multi. Use one or two Wall Breakers to reach one more compartment if it exposes hero targets.
- Town Hall decision. If your heroes cannot reach it early, take it with Blimp behind a lava hound or with the Battle Drill later if pathing permits.
- Hog line. Deploy Hogs in a 6 to 8 tile wide line to reduce splash focus. Send Battle Drill slightly ahead to trip giant bombs and break walls in front of the Hogs.
- Headhunter timing. Send 2 to 3 Headhunters under a Freeze when the enemy Queen or Royal Champion targets your Hogs.
- Heals over splash. Place Heals to cover Wizard Tower clusters, multi inferno beams, and likely bomb gaps between tight compartments.
Common pitfalls and fixes
- Sui heroes stall behind storages: use a Rage or an Invisibility to push them through key defenses. Value hero time over greed.
- Battle Drill paths away: drop the Drill closer to the densest walls or funnel more sharply with the King.
- Town Hall late and blasts your Hogs: commit the Blimp earlier with two Balloons as coco and a Freeze on the Town Hall beam if needed.
TH specific tweaks
- TH12 to TH13: you can often skip Headhunters for the King and save space for extra Hogs. One Heal is sometimes enough with good Freeze value.
- TH14 to TH16: keep at least two Freezes for scatter and core multi intersections. If monolith is present, save a Freeze or plan your Drill path to stun it.
Why it works
- The hero dive removes critical defenses that stall Hogs. The Drill ensures traps and walls do not stop the train. It is low spell cost and high tempo.
3. DragBats with Ice support
Why it is underrated
- Many builders have shifted to anti Super Archer and anti Lalo designs, leaving surprising bat value on the table. Bats shred splash light back ends, and Dragons provide a steady push that keeps bats safe once key splash points are frozen.
When to pick it
- Two or fewer Wizard Towers covering the back side after Dragons push through the front.
- Air Sweepers not both pushing against your main flight.
- Multis are separated so you can Freeze them individually or tank them with Ice Golems during the bat wave.
Army and spell template
- Troops: 7 to 8 Dragons, 1 to 2 Baby Dragons, 2 to 3 Ice Golems, 10 to 12 Balloons, a handful of Wizards for funnel, and 10 to 12 minions for cleanup.
- Spells: 4 Bat Spells, 3 Freeze, 2 Rage, 1 Poison. Consider 1 Invisibility flex if you are confident on splash control.
- Siege: Stone Slammer or Blimp for Town Hall. Flame Flinger can work if a corner is free.
Step by step
- Funnel for a straight flight. Use Baby Dragons and a couple of Balloons to clip outer defenses. Do not start bats until you control at least two splash anchors.
- Main flight. Send Dragons in a line with Balloons in front. Rage at the first high damage area and again at the Town Hall or scatter.
- Town Hall plan. Use Slammer or Blimp with Rage or Invisibility to secure it if Dragons path away. Prioritize not losing your bat plan to a desperate Town Hall race.
- Bat wave. Launch bats from a side with no Wizard Tower and no red mine fields. Freeze the first splash they meet and chain Freezes to walk bats across the back end.
Common pitfalls and fixes
- Wizard Tower snipes bats: track the rotation and pre Freeze before the first splash lands.
- Sweeper blows bats off line: choose bat entry on a sweeper blind spot or Freeze the sweeper if it disrupts a critical cast.
- Dragons split and leave a scatter: keep 1 Freeze to bridge that scatter for bats or redirect with a late Baby Dragon.
TH specific tweaks
- TH10 to TH12: classic DragBats shines, splash counts are lower. Expect to use fewer Freezes.
- TH13 to TH15: Scattershots require tighter Freeze chaining. Bring an extra Freeze over a Rage if you lack hero levels.
- TH16: If monolith is central, do not bat near it. Use bats to clean backside where monolith beam cannot reach.
Why it works
- Dragons supply a reliable front line and tanking, while bats convert a splash light backside into a tidal wave. The comp punishes builders who over invest in core splash and neglect far edges.
4. Super Archer Blimp into Dragon Riders
Why it is underrated
- Everyone pairs Super Archer Blimp with Lalo, so many bases are primed to trap the Lalo follow up, not Dragon Riders. Riders do not care about walls, pack strong single target DPS, and are easier to path after a large core is removed by the blimp.
When to pick it
- Town Hall and at least one scatter are reachable by the blimp from a safe angle with two to three Invisibility spells.
- The remaining base edges form clean lines for Riders, and air defenses are not all stacked on one side.
Army and spell template
- Troops: 6 to 7 Dragon Riders, 10 to 14 Balloons, 1 to 2 Baby Dragons, a few minions, and a small ground funnel kit.
- Spells: 3 to 4 Invisibility, 1 Rage, 2 Freeze, 1 Haste, 1 Poison. Flex an extra Haste if Riders need speed across a long alley.
- Siege: Battle Blimp for Super Archer value. Stone Slammer as backup if sweeping and traps prevent blimp reach.
Step by step
- Flight path. Identify a safe blimp lane with coco Balloons. Freeze a sweeper or x bow if needed to protect the blimp.
- SA blimp value. Land in a pocket spanning the Town Hall and a scatter or multi. Rage first, then chain Invis every 2 seconds as shots fire. Do not over Invisibility the Town Hall itself unless the first volley would miss it.
- Edge prep. Use heroes to remove one corner so Riders do not drift. A King plus Queen can take an air defense and an archer tower line cheaply.
- Riders and loons. Deploy in a shallow arc towards remaining splash anchors. Use Haste to jump into a scatter and Freezes for core multi beams or a monolith crossing.
- Headhunters for the Royal Champion. Send under a Freeze the moment she targets your Riders or balloons.
Common pitfalls and fixes
- Blimp lands short: if Tornado or traps catch it, be ready to Invisibility the Super Archers immediately where they land. Rage placement must still have them covering TH or a scatter.
- Riders stall on storages: widen the entry and do not starve them of Balloons up front to clear point defenses ahead.
- AD stacked on one side: send heroes into that side first so Riders can fly the opposite edge.
TH specific tweaks
- TH13 to TH14: fewer monolith and beam threats mean more freedom with Freeze allocation. One Haste often enough.
- TH15 to TH16: keep a Freeze or Invisibility to cross monolith or a double multi. Bring 2 Headhunters minimum for heroes.
Why it works
- Super Archer Blimp deletes the base brain. Dragon Riders then operate with minimal pathing noise, slicing remaining defenses with strong, predictable lines.
5. GoHoBo with Log Launcher
Why it is underrated
- Older GoHoBo fundamentals remain potent on compact or boxy layouts, especially when a Log Launcher opens the core for your kill squad and strips hidden giant bombs before Hogs enter.
When to pick it
- Compact bases with double x bow cores and short distances between compartments.
- High value core reachable with a straight push, and Wizard Towers not all stacked in the back.
Army and spell template
- Troops: 2 to 3 Golems, 10 to 14 Bowlers, 16 to 20 Hogs, 4 to 6 Wizards, a few Wall Breakers.
- Spells: 2 Rage, 1 to 2 Heal, 1 Jump or a third Rage if the Log Launcher will handle walls, 1 Freeze, 1 Poison.
- Siege: Log Launcher with Yetis or Bowlers inside. Fallback to Wall Wrecker if needed.
Step by step
- Entry lane. Golem tank, Wizards funnel. Bowler line behind. Drop Log Launcher straight toward the eagle or the core multis.
- King and Queen follow. Rage early as the pack meets first heavy defenses. Poison the CC.
- Hog supplement. As soon as the core opens, send Hogs down the flanks to trim and prevent the bowlers from waddling sideways.
- Heals for edges. Cover Wizard Tower clusters and bomb gaps where Hogs run without Golem tanking.
Common pitfalls and fixes
- Bowlers walk: make the funnel deeper. Use an early Baby Dragon on the outer layer.
- Log Launcher sniped by a side defense: place a Golem or Ice Golem close to tank before dropping the launcher.
- Hogs arrive too late: start them as soon as the core opens, not after the push has cleared it.
TH specific tweaks
- TH10 to TH12: textbook GoHoBo shines. Two Rages can carry the kill squad through most cores.
- TH13 to TH15: you may need a Freeze for scatter or multi choke points. Do not over invest in Bowlers; Hogs should do the finishing work.
Why it works
- The kill squad deletes high value defenses and pulls or kills the CC, and the Hogs clean everything else. The Log Launcher clears walls and traps that used to stop this comp.
Scouting framework that makes these comps cook
Before committing, run this 60 second checklist:
- Surface splash map: Count Wizard Towers, multis, scatters, and their coverage overlaps. DragBats hates double Wizard Tower backsides. Hogs hate multi plus Wizard Tower chains.
- Hero access: Can your plan delete enemy Queen and Royal Champion early or under a simple Freeze window for Headhunters?
- CC control: Do you have a reliable poison timing or a blimp kill for hounds and ice golems that would stall your core?
- Trap thinking: Spring trap pockets vs Hogs, red air mine tunnels vs Riders or Dragons, Tornado near Town Hall to foil blimps.
- Siege angle: Do you have a safe Flinger lane, a protected Blimp path, or a Drill route that opens the right walls?
- Cleanup plan: Two Wizards and a handful of archers save more triples than an extra troop in the main wave.
Spell timing notes across comps
- Rages early, Heals late: Rage amplifies early breakthroughs. Heal sustains Hog or Dragon packs after the first push. Do not swap the two roles.
- Freeze rules of two: Always know your first two Freeze targets before the first troop drops. Everything else is improvisation.
- Invisibility cadence with Super Archers: Cast every two seconds, centered slightly behind the Archers so projectiles travel out of invis safely.
Player insights and small edges
- Battle Drill first contact: Its stun buys your Hogs time and pops giant bombs safely. Even one tile of forward Drill path can save a pack.
- Flame Flinger patience: A Flinger that lives 45 seconds often equals a scatter and four defenses worth of value. It is okay to delay your main push to let it work.
- Headhunter escorts: One Balloon and one Minion in front of Headhunters can strip small point damage and let them cross under a single Freeze window.
- Queen leash management: Angle Healers away from main pack entries so they do not swap targets to Hogs or Riders mid push.
Conclusion
These five off meta armies do not ask you to reinvent your play. They reward smart scouting, clean funnels, and crisp spell timing. Queen Charge Hogs with Flinger punishes bases that disrespect siege value. Sui Hogs with Drill trades complexity for tempo and trap safety. DragBats flips splash light backsides into free stars. Super Archer Blimp into Dragon Riders exploits a trap meta built for Lalo. GoHoBo with Log Launcher modernizes a classic for compact bases.
Pick one, practice it for a week, and let your clan know you are bringing it to war. Save replays, track where the plan failed or spiked, and refine your base identification. The meta will keep shifting, but these fundamentals will keep turning good plans into green screens.


