Grand Warden in Hybrid Armies: Pros and Cons
20 min read Master the Grand Warden in hybrid armies with precise tome timing, pathing control, and smart tradeoffs.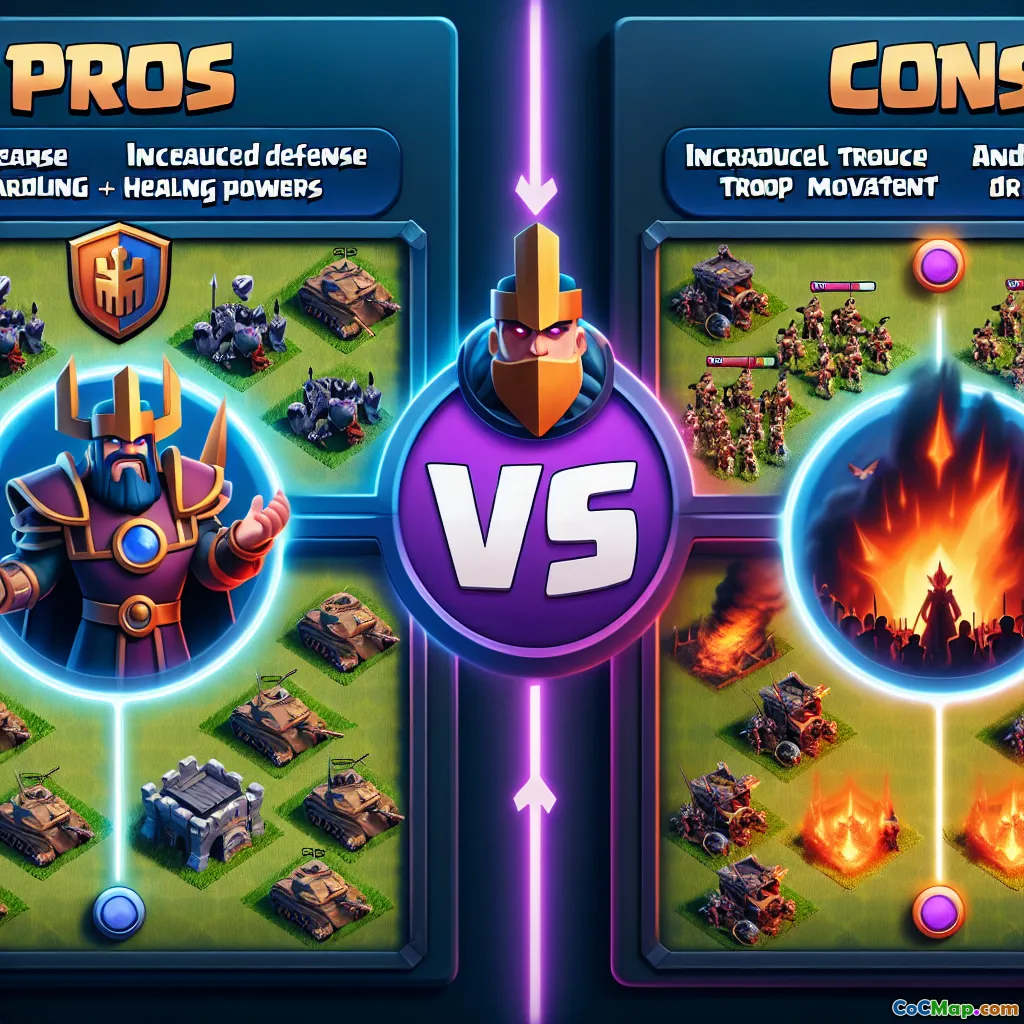
Grand Warden in Hybrid Armies: Pros and Cons
Introduction
What if your strongest hybrid upgrade isn’t a level on your Miners or Hogs, but the precise five seconds you get from a single hero ability? The Grand Warden’s Eternal Tome is the split‑second pivot that separates average Hybrid hits from surgical triples. Yet the same hero can wander off with a Pekka from your Siege Barracks, ignore your Miners, and leave your army exposed at the worst moment.
If you’ve ever watched a promising Queen Charge Hybrid melt under Scattershot fire while your Warden floats after the wrong troop, this article is for you. We’re breaking down exactly how the Grand Warden impacts Hybrid armies—when he’s a win condition, when he becomes a liability, and how to make his aura and Tome work with your plan, not against it.
Why the Grand Warden Matters in Hybrid
Hybrid armies—typically Miners plus Hog Riders, with a Queen Charge and Siege support—live or die on momentum. Miners sponge multi-target splash but get wrecked by chain damage; Hogs sprint through defenses but hate Giant Bomb chains and Scattershots. The Grand Warden offers two unique benefits Hybrid can’t replicate with spells alone:
- Life Aura: A persistent HP boost within a generous radius that keeps the pack healthier through sustained damage. This is especially strong when Miners surface under splash or when Hogs chain defenses.
- Eternal Tome: A short-duration, full invulnerability that lets your entire mid-game army pass through the most lethal zones—the Town Hall blast, Scattershot volleys, Giant Bomb clusters, and key Hero snipes with Headhunters.
Together, aura and Tome create a window where Hybrid transitions from funnel to core to back-end cleanup without losing mass. But realizing that potential depends on timing, pathing, and who the Warden chooses to follow.
Ground or Air Warden for Hybrid?
- Ground: Default for Hybrid. He stays closer to Miners and Hogs, keeps aura on the bulk of the army, and is easier to anchor behind your kill squad. Ground also lets him absorb ground-target defenses once the pack thins.
- Air: Situational. Air Warden avoids ground traps and Skelly spells, which can be useful versus trap-heavy cores. However, Air increases the chance he drifts to unrelated air targets (e.g., Healers or Baby Dragons from a funnel), which can desync your aura and Tome from the Hybrid push. Most experienced players stick to Ground and manage pathing deliberately.
Warden Walk vs. Queen Charge in Hybrid Openers
Hybrid’s two common openers change how you use the Grand Warden:
-
Queen Charge Hybrid (most popular): You invest the Queen and Healers to remove enemy CC or a key compartment, then launch Miners and Hogs through the core. In this setup, the Warden typically joins the Hybrid push, not the opener. Pros: Clean kill on CC and enemy Queen, controlled funnel, predictable Warden path. Cons: Heavy spell budget on the charge, making Tome timing even more precious later.
-
Warden Walk Hybrid (niche): A short Warden Walk carves a funnel for the King and Siege, while the Queen supports the main push or a lighter flank. Pros: Safer against Rage-hungry charges, reduces the chance your Queen dies early. Cons: Time management becomes tight, and spending too long walking steals the Warden from the main push when you need aura and Tome most.
Rule of thumb: If the base demands a heavy charge to disarm CC and drive into Scattershots, keep the Warden for the Hybrid. Use a brief Warden Walk only when a single compartment funnel is mandatory and easy to take with minimal spells.
Eternal Tome: Timing Windows That Win Wars
Tome’s power isn’t just in pressing it. It’s pressing it against the correct threats at the right time. Prime Tome windows for Hybrid include:
- Town Hall and Giga Damage Zones
- Purpose: Avoid Giga Inferno beams, the Town Hall poison crater, and post-detonation splash.
- Execution: Trigger Tome as the bulk of Miners and Hogs step into the Town Hall tile range or as they path through the poison crater on exit. If you’re sending Headhunters under Tome to snipe the enemy Royal Champion or Queen, sync their entry with the button.
- Scattershot Crossfire
- Purpose: Negate overlapping Scattershot volleys that would otherwise chunk Miners and delete Hogs.
- Execution: Watch for two Scattershots to lock onto your pack; hit Tome just before impact to cover the initial volley and the follow-up as you pass through. Aim to have a Heal ready after Tome ends to recover the aura-only troops.
- Giant Bomb Strings and Spring Trap Corridors
- Purpose: Prevent Hog deletion when hitting predictably trapped lines (commonly between Wizard Towers and high-value defenses).
- Execution: Tome for invulnerability through the first two bombs, then layer Heal beyond them. If you don’t need Tome there, pre-placed Heal plus Freeze on a single key defense can sometimes suffice, saving Tome for the core.
- Headhunter Windows
- Purpose: Kill enemy heroes without losing your pack to their DPS.
- Execution: Send 2–3 Headhunters under Tome as your Hybrid engages the enemy Queen or RC. The invulnerability lets them connect safely while Miners and Hogs keep moving.
Pro Tip: Don’t panic Tome. Better to lose a few Hogs to splash with a post-damage Heal than to blow Tome early and watch the core shred your push.
Managing Warden AI and Pathing
The Warden follows the highest-hitpoint troops within range. In Hybrid, common anchors include:
- Your Siege Barracks Pekka
- Barbarian King
- A dense Miner ball
- A clump of Hogs
Mistakes happen when the Warden anchors to the Pekka or King on the flank instead of the Hybrid wave. To avoid this:
- Delay Siege Barracks: Launch Miners and Hogs first, let the Warden lock onto them, then drop the Siege a few seconds later so the Pekka doesn’t steal aggro.
- Anchor With First Wave: Deploy Miners slightly earlier than Hogs so the Warden picks up the bigger Miner pack.
- Don’t Spread Too Wide: Overly wide entry points split your army and confuse Warden anchoring. Pick a lane, open it with spells and heroes, and send the pack through as a single mass.
- Keep King Busy Elsewhere: If you use the King for a side lane, deploy him a beat before the Hybrid and slightly farther from the Warden to avoid him stealing the anchor.
Spell Pairing: Aura, Tome, and Heals
- Aura plus Heal: When aura is active and your pack is taking sustainable damage (e.g., Wizard Tower plus Archer Towers), a single Heal can carry a long way. Resist stacking multiple Heals unless you’re entering stacked multi-damage.
- Tome then Heal: Ideal for lethal moments like Scatter crossfire or the Town Hall explosion. Tome denies burst; Heal recovers from chip immediately after invulnerability ends.
- Rage on the Charge, Not the Hybrid: Most Hybrid plans invest Rages on the Queen Charge to guarantee the CC and essential compartments. In return, you rely on aura, Tome, and targeted Heals to keep the Hybrid rolling.
- Freeze for Precision: A single Freeze on a Scatter, Inferno, or enemy RC during Tome can extend that invulnerability window’s value—your troops move forward faster and take less post-Tome chip.
Pros of Using the Warden in Hybrid
- Core Breakthroughs Become Reliable
- Tome ensures your pack survives the nastiest part of the base. Hybrid without Warden often stalls at the Town Hall or between dual Scatters.
- Stronger Mid-Fight Sustain
- Life Aura plus timely Heals stretches troop longevity. Miners in particular feel tougher, letting them surface, tank, and re-burrow without bleeding out.
- Headhunter Safety
- Tome enables safe assassination of enemy heroes, especially on bases where the RC and Queen sit behind splash and traps.
- Flexible Siege Options
- With Warden covering the pack, you can run Siege Barracks for extra Hogs and a Pekka to clear a wing, or Log Launcher to open key walls for charge-plus-hybrid merges.
- High Skill Ceiling
- Players who control Warden pathing and Tome timing see dramatic consistency gains, particularly on anti-three bases that punish sloppy pushes.
Cons of Using the Warden in Hybrid
- AI Drift and Mis-Anchoring
- If he latches onto the Pekka or King, your Hybrid loses aura and Tome coverage right when it matters. One bad anchor can cost the attack.
- Time Pressure with Warden Walks
- A long Warden Walk to set the funnel steals time from the main push. Hybrid is susceptible to late clean-up time fails if you over-invest in the walk.
- Spell Budget Tension
- Heavy Queen Charges require multiple Rages and sometimes Freezes. That leaves fewer Heals to pair with aura and Tome, making precision mandatory.
- Overreliance on Tome
- Some players hit Tome at the first sign of trouble and then have nothing for the Town Hall blast or Scatter crossfire. The ability is forgiving but not a cure-all.
- Pathing Sensitivity
- Hybrid thrives on tight lanes. If your funnel is incomplete, the Warden’s aura might cover only a slice of your troops, dulling his impact.
Base Identification: When Warden Wins You the Hit
Use the Warden aggressively when you see:
- Centralized Town Hall with tight splash clusters: Tome guarantees survival through the Giga and lets Headhunters pick off the RC.
- Double Scatter cores: Tome covers the first volley and buys time to close distance.
- Predictable trap corridors between Wizard Towers and core compartments: Tome plus a post-window Heal keeps Hogs alive through bomb strings.
Be cautious when you see:
- Side Town Halls with baited pathing that split Miners and Hogs: Harder to keep the Warden on the main group.
- Heavy Skelly trap zones spread wide: Miners get delayed, Hogs surge forward, and Warden struggles to cover both unless your entry is narrow.
- Ring bases with deceptive gaps: If your charge doesn’t remove the right ring nodes, Hybrid can swirl, and Warden coverage fragments.
Deployment Templates You Can Trust
- Queen Charge into Hybrid with Ground Warden
- Charge: Queen with 4–5 Healers takes CC, enemy Queen, and a Scatter or X-Bow cluster.
- Funnel: King plus a Siege Barracks clear the opposite edge after the Queen has path control.
- Hybrid Launch: Miners just ahead of Hogs on a single, wide tile line toward the Town Hall.
- Warden: Ground, dropped with the first Miners to anchor on them.
- Tome: Over Town Hall detonation or first Scatter crossfire. Follow with Heal where troops take chip.
- Short Warden Walk into Hybrid
- Walk: 20–25 seconds to trim a stubborn corner or snipe a single compartment without spells.
- King and Siege: Set the opposite funnel; do not drop Siege before the Hybrid if you’re worried the Warden will swap.
- Hybrid Launch: Same as above; ensure the Warden re-anchors to the Miner mass before engaging key defenses.
- Log Launcher Charge plus Hybrid Merge
- Use the Queen plus Log Launcher to open a straight lane through one Scatter and an Inferno.
- Hybrid enters through the opened lane toward the Town Hall.
- Tome as your troops approach the Town Hall or when the second Scatter locks on.
Common Mistakes and How to Fix Them
-
Mistake: Warden follows the Pekka from Siege Barracks. Fix: Drop Miners and Hogs first, let the Warden lock, then place Siege Barracks.
-
Mistake: Early Tome on entry. Fix: Save Tome for a lethal, unavoidable moment—Town Hall, dual Scatter, or Headhunter window. Use a Heal for entry chip.
-
Mistake: Overlong Warden Walk. Fix: Cap your walk to under 30 seconds unless it deletes a critical compartment. Hybrid needs time to travel and clean up.
-
Mistake: Split Hybrid entries. Fix: One wide line is fine; two separate entries are not. Keep the pack contiguous so aura and Heals pull full value.
-
Mistake: Healers switch to the Warden mid-attack. Fix: Maintain healer distance from the Warden by deploying him with the main pack and sending the Queen on a different lane. Avoid overlaps where Healers can retarget.
Town Hall Level Adjustments
- TH12–TH13: Town Hall isn’t as punishing as higher levels, but Giant Bomb strings and Infernos still hurt. Prioritize Tome for Scattershots and Headhunter windows.
- TH14: Giga Poison is more threatening. Time Tome as you enter or exit the Town Hall crater and bring an extra Heal.
- TH15–TH16: High-damage cores with multi-layered splash demand disciplined Tome. Consider a Freeze or Invisibility for emergency saves if your Queen Charge falters. Aura’s value increases as sustained chip rises.
Practice Drills to Master Warden Timing
- Friendly Challenge Scatter Drills: Launch Hybrid into a dual Scatter core three times. First run Tome early, second run Tome late, third run Tome on the second volley. Compare troop count at 50% destruction.
- Anchor Control Practice: Try delaying Siege Barracks by 5–7 seconds on identical bases. Note how often the Warden stays on the miner mass.
- Headhunter Sync: Practice sending 2–3 Headhunters under Tome precisely as your pack engages the enemy RC. Track consistency in hero picks without troop loss.
Advanced Tips and Micro Tricks
- Pre-Heal on a No-Tome Entry: If you intend to save Tome for the core, pre-drop a Heal where your Miners surface into splash to avoid early thinning.
- Tome to Cross a Kill Zone, Not to Start One: Press Tome at the boundary of danger so most of its duration is spent moving through the lethal area, not standing in front of it.
- RC Cleanup Pathing: If you expect the Warden to drift late, send the Royal Champion on the opposite side to collapse splash and herd the Warden back toward the pack.
- Invis for Emergency Queen Saves: If your charge stumbles right before the Hybrid launch, a fast Invisibility can keep the plan intact so Tome remains available for the Hybrid.
Conclusion
The Grand Warden is the Hybrid commander you never directly control: a quiet aura, a single, massive button, and an AI that insists on doing its own thing. Used correctly, he turns dangerous cores into speed bumps and buys the seconds your Miners and Hogs need to break the base. Mismanaged, he drifts, you panic Tome, and the core eats your army.
Make the Warden work for you by anchoring him to the Miner mass, saving Tome for lethal moments, and pairing aura with efficient Heals. Keep Siege timing deliberate so the Pekka doesn’t kidnap your pathing. Most of all, practice—simulate Scatter crossfire, rehearse Town Hall entries, and drill Headhunter sync under Tome. Master these habits, and the Warden becomes more than a safety net. He becomes the reason your Hybrid triples land when everyone else’s fall short.


