Tornado Trap Mastery: Disrupting Queen Charges Like a Pro
19 min read Turn the Queen Charge into a trap. Learn pro level Tornado Trap setups, combos, and placements.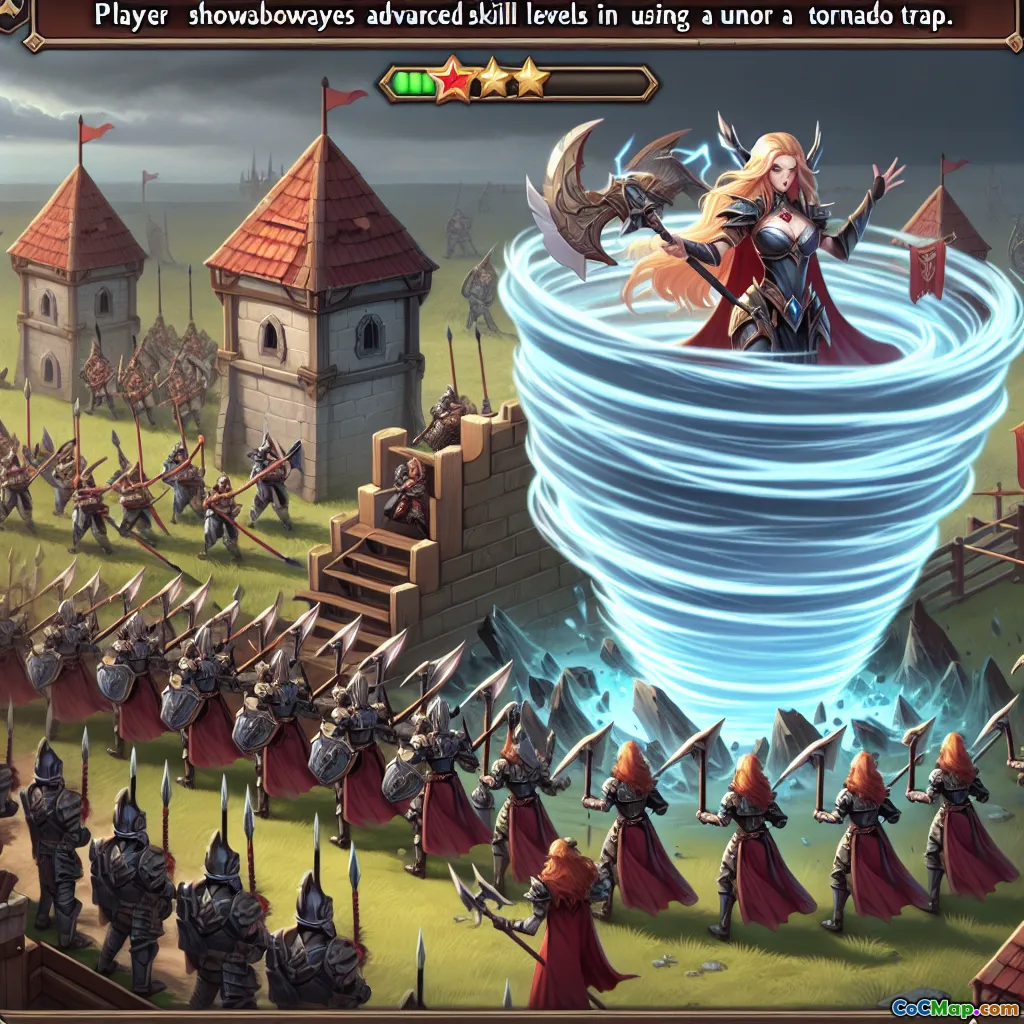
Tornado Trap Mastery: Disrupting Queen Charges Like a Pro
If a single, two-by-two tile could force a Queen’s ability, kill three Healers, and derail an entire plan, would you build your base differently? The Tornado Trap can do exactly that—if you place and pair it with intent. This guide unpacks the precise mechanics, placements, and synergies that turn a good defense into a war-winning ambush against Queen Charges.
Why the Tornado Trap Is the Queen Charge’s Silent Nemesis
Queen Charge is all about control: steady pathing, spell efficiency, and keeping Healers safe under predictable damage. The Tornado Trap injects chaos at the one moment attackers can’t afford it. When it triggers:
- It pulls units into a fixed center, stalling forward progress and altering pathing.
- It clumps Healers, making them vulnerable to Red Air Bombs and Air Defense.
- It holds the Queen under sustained DPS such as Single Infernos, Monolith, and X-Bows, forcing early ability or extra spells.
Well-placed Tornado Traps don’t just create damage—they create timing collisions. Freeze windows become awkward, Rage values drop, and Wall Breaker timing fails. That’s where bases win defenses.
Know the Device: Mechanics You Must Exploit
Understanding how the Tornado Trap actually behaves is the difference between random placement and surgical disruption.
- Triggering: Activates on both ground and air troops. Any unit entering its radius will set it off.
- Pull effect: Draws units toward its center and keeps them spinning in place. This stalling effect is what enables defensive structures and trap chains to connect.
- Duration by level: Spin time increases with upgrades. Expect roughly a 6–8 second hold from low to max level. Check in-game info for current exact values, but plan your setups around a meaningful multi-second stall.
- Radius and footprint: It’s a 2x2 trap with a modest activation radius and a central pull. Placement one to two tiles off the path can still yank the Queen and especially her Healers.
- Interaction with heroes and Siege Machines: Heroes and Siege Machines are affected; the Blimp can be held in place long enough for air-targeting defenses and traps to finish it off.
Key implication: Any combo that requires a second or two of stall—Inferno lock-on, Monolith ramp, Red Bomb chain—pairs beautifully with Tornado.
Placement Archetypes That Punish Queen Charge
Think in archetypes, not single tiles. Here are proven setups that consistently hit Queen Charges.
1) The Inferno or Monolith Anchor
Goal: Force ability or multiple spells.
- Place the Tornado Trap adjacent to a Single Inferno or Monolith, slightly offset from the expected entry angle.
- Add a Skeleton Trap in ground mode nearby to layer extra stall; vs Electro Titan entries, use air mode instead to avoid instant aura clears.
- Surround with awkward Freeze targets: a Scattershot or X-Bow just outside the Freeze radius of the Single/Monolith makes the attacker choose what survives.
Why it works: The Tornado’s stall buys ramp time for Single or sustained DPS for Monolith. Attackers either burn ability early or chain multiple Freezes to survive—weakening their mid-attack toolkit.
2) Healer Deletion Zone
Goal: Delete two to four Healers and collapse the charge.
- Position the Tornado on a tile where Healers naturally stack behind the Queen—often near a key pivot building like an Air Defense or Scattershot.
- Cluster two or three Red Air Bombs slightly behind the Tornado center, so clumped Healers drift into the blast radius during the spin.
- Offset a Seeking Air Mine deeper so a single coco loon can’t disarm the entire setup.
Why it works: Healers bunch up under Tornado. Red Air Bombs do splash damage; two well-timed explosions can wipe most of the pack, and one Seeking Air Mine can finish a straggler.
3) Anti-Blimp Bridge on Town Hall Side
Goal: Catch Rage Invisibility Blimps and disrupt funneling.
- Put the Tornado a few tiles in front of the Town Hall, between likely blimp entry and the TH.
- Add Air Bombs in the blimp’s route, and a Seeking Air Mine slightly behind Tornado.
- Pair with a high-DPS pocket (TH weapon, Giga Bomb, or Monolith) to punish stalled drops.
Why it works: Foundational for anti-Blizz. The blimp stalls, invisibility timers and Rage overlap poorly, and value drops.
4) Box Base Queen Path Detour
Goal: Control the Queen’s step decisions and break Wall Breaker logic.
- Place the Tornado near a connecting compartment junction where the Queen chooses between two layers.
- Add a small bomb to snipe Wall Breakers that reach during the spin.
- Ensure one side houses an Inferno or Scatter to force spells while the Queen is stuck.
Why it works: Timing breaks win. If the Queen’s ability pops before the core, the back half of the plan collapses.
Synergies That Multiply the Trap’s Value
The Tornado Trap is best-in-class when paired with the right supporting cast.
- Red Air Bombs: The premier Healer delete partner. Cluster them to catch clumped Healers. Avoid putting all Reds in one place if your base also needs Lavaloon coverage—split clusters by zone.
- Seeking Air Mines: Offset from expected coco loon routes. One SAM plus one or two Reds during Tornado can clear most Healers.
- Skeleton Traps: Use air mode vs Queen Charges that include Electro Titans; use ground mode vs standard Queen Charges without Titans. Skeletons add stall and make Headhunters awkward for attackers.
- Single Inferno or Monolith: Tornado extends exposure time, forcing ability or heavy spell investment.
- Scattershot: Its splash punishes grouped heroes and pets during Tornado. Position it so Freeze coverage becomes inefficient.
Pro tip: Overlap your defensive anchor’s aura with Tornado center by one to two tiles. Too far, and Tornado stalls but doesn’t punish; too close, and coco loons may trigger it before the Queen arrives.
Reading the Attack: Predicting Where the Queen Will Step
Stop guessing and start predicting based on funnel logic.
- Healers follow the Queen’s distance and line-of-sight pathing. If a funnel forces the Queen to walk along a long wall, expect Healers to trail just inside the walkway.
- Air Defense magnets: Attackers want Healers safe from AD beams; they’ll freeze or rage to cross AD pockets. Put Tornado on the exit tile of that AD pocket.
- Wall Breaker windows: Commonly, Wall Breakers hit right as the Queen reaches a 90-degree corner. Place Tornado one tile past that corner inside the base to interrupt the break.
- Spell efficiency: Where would a single Freeze cover both Monolith and Inferno? Avoid that overlap by placing Tornado so that “saving both” with one Freeze is impossible.
Three Blueprinted Setups You Can Copy Today
A) Anti-Queen Charge Single Inferno Pocket (TH12–TH16)
- Layout: Single Inferno two tiles behind a wall pocket; X-Bow set to ground nearby; Air Defense offset.
- Tornado: One tile inside the pocket entry, slightly off center toward the AD.
- Traps: Two Red Air Bombs behind Tornado center, one Seeking Air Mine deeper; one Skeleton Trap ground mode.
- Outcome: Queen gets pulled while Single ramps. Reds hit Healers; SAM catches the survivor. Freeze windows desync because X-Bow and Single can’t be frozen together efficiently.
B) Town Hall Side Anti-Blizz Bridge (TH13–TH16)
- Layout: Town Hall with a narrow approach lane; Scattershot on flank; Monolith deeper in core at higher THs.
- Tornado: Three to four tiles in front of TH, inside expected landing spot.
- Traps: Air Bomb on approach, Seeking Air Mine behind Tornado, small bombs around for Super Wizards if Blizz lands.
- Outcome: Blimp stalls, rage and invisibility sequence misaligns. Even if they land, timers are off and value is lower.
C) Box Base Queen Pivot Denial (TH14–TH16)
- Layout: Two small connectors into core; multi Inferno in one, Single in the other; AD and X-Bow cover both.
- Tornado: Just inside the connector leading to Single.
- Traps: Red Bomb pair behind Tornado; Skeleton Trap air mode; Giant Bomb at wall edge to punish Yetis or King aid.
- Outcome: Queen rotates in, triggers Tornado, Healers eat splash, Single ramps, and pivot step fails.
How Attackers Counter You—and How to Adapt
- Cocoa Loons: Skilled players send a Balloon over likely Healer paths to trip SAMs and sometimes Tornado. Counter by placing Tornado where coco loons are less likely to fly—one tile inside walls or at a 45-degree Queen step rather than straight-line paths.
- Freeze and Rage Overlaps: Attackers aim to cover Tornado plus anchor with one Freeze, or keep Queen alive with Rage. Position your Tornado so that freezing the anchor leaves Scattershot or X-Bow free to fire.
- Electro Titan Walk: Titan aura clears Skeletons quickly and shrugs off chip. Use air-mode Skeleton Traps, and lean harder on Red Bomb clusters and SAM to target Healers instead of stalling the Titan.
- Recall Spell: Some attackers will Recall the Queen out of a bad tornado. Punish the landing. Place a second trap set (SAM or Reds) along common re-entry points so the Healers die after recall.
- Pathing Reroutes: Good players react mid-attack. Design your Tornado to drive the Queen toward a dead zone where your DPS stack is waiting. Predictable chaos beats reactive control.
Testing and Tuning: Make Your Trap Do Real Work
- Friendly Challenges: Run targeted tests. Ask a clanmate to Queen Charge from your suspected entry. Save replays and note where the Healers stand when Tornado pops.
- Adjust by one or two tiles: Tiny shifts change everything. Move Tornado and Red Bombs together as a package until the Healer clump gets hit consistently.
- Scout replays: After a war attack, check if coco loons popped your Tornado early. If so, tuck it one tile deeper or off the common line.
- Legends League iteration: Rotate between two or three placements every few days to remain unpredictable while maintaining core synergy.
Common Mistakes to Avoid
- Placing Tornado directly on the first wall break tile: Early triggers waste the stall before key DPS engages.
- Stacking every Red Bomb with Tornado on a base that also needs anti-Lavaloon coverage: Split Reds by zones; dedicate two near your Tornado plan and keep others for Loon pathing.
- Overlapping perfect Freeze value: If Tornado, Single, and Scattershot can all be frozen together, attackers will handle it cheaply.
- Telegraphed pockets: If your Tornado sits on the only tile that makes sense, smart players will send a test troop. Add decoy value—small bombs or skeletons elsewhere—to create doubt.
Meta Notes by Town Hall Bracket
- TH11–TH12: Tornado is newly available. Healers are common; Single Infernos are deadly with Tornado support. You have fewer Red Bombs—place them with care.
- TH13: Scattershot enters; Tornado stall lets Scatter punish clumped heroes and Healers. Blizz openers become popular—use the anti-blimp bridge.
- TH14: Pets increase Queen survivability. Compensate with tighter Tornado plus Red Bomb clusters to delete Healers rather than focusing only on the Queen herself.
- TH15–TH16: Monolith changes calculus. Tornado next to Monolith forces massive spell investment. Attackers often bring Electro Titan; adapt Skeleton Trap modes and lean on air-targeted trap chains.
A Practical Placement Checklist
Use this five-point checklist before locking your war base.
- Identify the most likely Queen entry. Ask why that side is attractive—Funneling, AD positions, or Scatter value.
- Choose an anchor: Single Inferno, Monolith, or Town Hall bridge. Your Tornado should serve that anchor.
- Set the Healer kill: two Red Bombs + one SAM offset from coco loon routes.
- Design spell tax: Make sure a single Freeze cannot cover both Tornado center and your anchor; force at least two spells to survive.
- Test and slide: Move the set by a tile after two or three FCs until replays confirm consistent Healer hits or forced ability.
Advanced Micro: Tile Nuances That Matter
- One-tile offset from walls: This reduces early trips by Wall Breakers or stray troops, while still catching the Queen as she steps through.
- Diagonal pulls: A Tornado placed diagonally from the path pulls Healers across Air Defense range arcs, increasing AD time-on-target.
- Layered depths: Stagger Tornado slightly shallower than your Red Bombs. Healers enter, clump, then drift deeper into the bomb radius on second three or four.
- Anti-recall follow-up: Trap common re-entry edges with a single SAM or a lone Red Bomb cluster to punish greedy recalls.
Case Study: Forcing Ability at 1 Minute 35 Seconds
Scenario: TH15 box base. Expected entry at 3 o’clock to remove Scatter and set the Queen into core.
- Placement: Tornado two tiles inside the 3 o’clock connector, Single Inferno behind, X-Bow ground aiming at the connector.
- Traps: Red Bomb pair behind Tornado, SAM deeper, Skeleton Trap ground.
- Attack outcome: Queen steps in, Tornado triggers, Healers clump and eat Reds. Single ramps; Freeze lands but X-Bow remains active. Queen ability forced at 1:35, one Healer dies to SAM, second Red cleans another. The follow-up Lalo loses momentum without a strong core charge.
Lesson: It’s not about the biggest trap; it’s the collision of timings.
Conclusion: Build for Timing Collisions, Not Just Damage
The Tornado Trap is not a raw damage dealer—it’s a timing weapon. When you place it to:
- Extend exposure to Single Infernos or Monolith,
- Pull and clump Healers into Red Bombs and SAMs,
- Break Freeze and Rage efficiency windows,
you convert a predictable Queen Charge into a panicked scramble. Start with one anchor setup, add the Healer delete, and tune by tiles. Review replays, adjust, and keep your opponents guessing. Do this well and that tiny 2x2 square will win you more wars than any maxed defense you own.
Ready for the next step? Run three Friendly Challenges from your predicted entry, then shift your Tornado-Red-SAM package by a single tile each time. Watch the Healers—and your opponents’ confidence—spin away.


