Wizard Tower - Building Units in Clash of Clans
"The Ultimate Arcane Defense ! Tower Wizards cast powerful area effect spells that target both flying and ground troops ."
| Level | Damage per second | Damage per shot | Hitpoints | Cost | Build time | Experience gained | Town hall level required |
|---|---|---|---|---|---|---|---|
| 1 | 11 | 14.3 | 620 | 100,000 | 1h | 60 | 5 |
| 2 | 13 | 16.9 | 650 | 150,000 | 1h 30m | 73 | 5 |
| 3 | 16 | 20.8 | 680 | 250,000 | 4h | 120 | 6 |
| 4 | 20 | 26 | 730 | 400,000 | 8h | 169 | 7 |
| 5 | 24 | 31.2 | 840 | 550,000 | 10h | 189 | 8 |
| 6 | 32 | 41.6 | 960 | 660,000 | 12h | 207 | 8 |
| 7 | 40 | 52 | 1,200 | 1,000,000 | 18h | 254 | 9 |
| 8 | 45 | 58.5 | 1,440 | 1,100,000 | 20h | 268 | 10 |
| 9 | 50 | 65 | 1,600 | 1,300,000 | 1d | 293 | 10 |
| 10 | 62 | 80.6 | 1,900 | 2,000,000 | 1d 6h | 328 | 11 |
| 11 | 70 | 91 | 2,120 | 2,500,000 | 1d 12h | 360 | 12 |
| 12 | 78 | 101.4 | 2,240 | 2,600,000 | 1d 18h | 388 | 13 |
| 13 | 84 | 109.2 | 2,500 | 3,000,000 | 2d | 415 | 13 |
| 14 | 90 | 117 | 2,800 | 4,500,000 | 3d | 509 | 14 |
| 15 | 95 | 123.5 | 3,000 | 5,500,000 | 4d | 587 | 15 |
| 16 | 102 | 132.6 | 3,150 | 8,000,000 | 4d 12h | 623 | 16 |
| 17 | 110 | 143 | 3,300 | 14,000,000 | 8d 12h | 856 | 17 |
Tapping this icon displays information about the Wizard Tower, such as Level, Damage Per Second, Hitpoints, Range, Damage Type and Targets.
Tapping this icon begins upgrading the Wizard Tower to the next level, if you have enough resources and a freeBuilder(orB.O.B). When the Wizard Tower is at maximum level, this icon is not shown.
Tapping this icon instantly upgrades the Wizard Tower to the next level, at the cost of oneHammer of Buildingif you have one. When the Wizard Tower is at maximum level, or if theTown Hallrequirements for the next level are not met, this icon is not shown.
Tapping this icon, which is displayed only while an upgrade is in progress, instantly finishes that upgrade at the cost of the displayed number ofGems.
Tapping this icon, which is displayed only while an upgrade is in progress, instantly finishes that upgrade at the cost of oneBook of Building. This icon is only shown if you have at least one Book of Building.
Tapping this icon, which is displayed only while an upgrade is in progress, instantly finishes that upgrade at the cost of oneBook of Everything. This icon is only shown if you have at least one Book of Everything but do not have a Book of Building.
Tapping this icon, which is displayed only while an upgrade is in progress, gives the player the option to assign aBuilder's Apprenticeto that Building. This icon only is only shown if you have unlocked Builder's Apprentice for 500Gems.
Tapping this icon, which is displayed only while an upgrade is in progress, boosts all your Builders for 1 hour by a factor of ten, at the cost of oneBuilder Potion. This icon is only shown if you have at least one Builder Potion.
Tapping this icon, which is displayed only while an upgrade is in progress, cancels the current upgrade and refunds half of the upgrade cost.
- The Wizard Tower is a defensive building that looks like a spiraling, cone-shaped tower of rock, then later a crystal like rock that has a Wizard on the top of it. It is capable of inflicting powerful splash damage to both ground and air units , though it is limited to a relatively short range.
- The Wizard Tower, like the Mortar , excels at mowing down entire groups of troops . However, unlike the Mortar, it has a relatively decent damage per second (making it more effective against higher health troops like Giants ), and it will target air troops in addition to ground troops. Also, unlike the Mortar, the Wizard Tower has no blind spot.
- Although the arcane blasts from the Wizard Tower do less damage per shot than the Mortar, it makes up for this by having a much higher rate of fire. This makes the Wizard Tower an excellent choice for defending other structures by blasting troops that get too close.
- Unlike the Mortar, the Wizard Tower can target both ground and air troops but can only damage either ground or air with each shot (not both). For example, if a Wizard Tower targets a Giant with some Balloons or Minions on top, only the Giant will be damaged while the Balloons/Minions would remain unharmed, and vice versa.
- At Town Hall 18, two level 17 Wizard Towers can be merged to form a Super Wizard Tower .
- An excellent defensive strategy for the Wizard Tower is to put it near your Town Hall , because of the Wizard Tower's splash damage and a relatively high rate of fire. However, due to its limited range, it is sometimes more desirable to put the Wizard Tower near the inside of your village. However, at higher Town Hall levels, it might be good to put the Wizard Towers on the outside of the base to clump up troops and damage tankers.
- However, at higher Town Hall levels, it might be good to put the Wizard Towers on the outside of the base to clump up troops and damage tankers.
- Putting your Wizard Tower and Bomb Tower next to your storages is an excellent method of protecting them against hordes of Goblins due to their high splash damage and fast attack speed.
- The Wizard Tower is a very important defense at Town Hall 5 and 6 due to the prevalence of Giant-related attacks at those levels. It also counters Balloon spamming very well.
- Wizard Towers and Mortars are quite complementary, as they can each cover the other's weaknesses. An example of a Wizard Tower-Mortar combination: the Mortar can cover a very large range so attacking units will have reduced health by the time they come into the shorter range of the Wizard Tower, which helps finish them off. In exchange, the Wizard Tower defends the Mortar by destroying units that cannot be attacked by the Mortar (all air units and ground units inside the Mortar's minimum range).
- An example of a Wizard Tower-Mortar combination: the Mortar can cover a very large range so attacking units will have reduced health by the time they come into the shorter range of the Wizard Tower, which helps finish them off. In exchange, the Wizard Tower defends the Mortar by destroying units that cannot be attacked by the Mortar (all air units and ground units inside the Mortar's minimum range).
- Try putting Wizard Towers near Air Defenses , along with Air Bombs to take out Balloons . The Wizard Tower works well against Balloonion (Balloon + Minion ). Put it near a Mortar and a storage to protect against various attacks. However, at higher levels and on war bases, this is not recommended since Wizard Towers will get caught on Lava Hounds , allowing supporting Balloons to obliterate your defense. Instead, focus on separating the two for allowing them to attack what they counter. Keep the Air Bombs with the Wizard Towers, and keep the Wizard Tower away from your Air Defense.
- However, at higher levels and on war bases, this is not recommended since Wizard Towers will get caught on Lava Hounds , allowing supporting Balloons to obliterate your defense. Instead, focus on separating the two for allowing them to attack what they counter. Keep the Air Bombs with the Wizard Towers, and keep the Wizard Tower away from your Air Defense.
- A single Wizard Tower can obliterate groups of Giants stuck behind a Wall , almost always dealing massive damage altogether because a Wizard Tower's splash radius and the Giant's slow attack combined with medium-low DPS would be another deciding factor.
- The Wizard Tower can be sniped by the Grand Warden , so players with Town Halls 11 and above should be wary of this. Placing them near the edge of the placeable area prevents this range advantage from being easily exploited by the Warden, but may leave them to be easily picked off by other units.
- Wizard Towers, along with multi-targeting Inferno Towers , are one of the best counters to Bat Spells at Town Halls 10 through 12. Leaving too many Wizard Towers close together and/or exposed can open up your base for a Bat-based attack, especially if you decide to set some or all of your Inferno Towers to single-target mode. However, try not to put Wizard Towers next to multi-targeting Inferno Towers, because a single Freeze Spell could freeze both of these defenses, which are vital for defending against Bats .
- However, try not to put Wizard Towers next to multi-targeting Inferno Towers, because a single Freeze Spell could freeze both of these defenses, which are vital for defending against Bats .
- For attacking, use some units to distract it ( Giants or Barbarians ) and destroy it with Archers , Minions , or another ranged troop . Melee troops like Barbarians or Giants can destroy a Wizard Tower by themselves if there are enough of them, but because these troops must attack while physically touching the Wizard Tower (and are therefore grouped up), the Wizard Tower can usually destroy the entire group fairly quickly.
- When deploying units, be careful to ensure that they won't get into a clump as they come into range of the Wizard Tower (e.g. attacking a Gold Storage that's near a Wizard Tower), because the Wizard Tower will destroy the group very quickly.
- Using Healers can support groups of Giants or other troops that would otherwise take severe damage from the Wizard Tower. Note, however, that this combination is ineffective if an Inferno Tower is in range or the Wizard Tower is capable of destroying your troops in one shot. Healing Spells can also work in a similar manner, and unlike Healers , they can also affect air troops. This is quite useful when using Balloons .
- Healing Spells can also work in a similar manner, and unlike Healers , they can also affect air troops. This is quite useful when using Balloons .
- Taking out Wizard Towers can be tricky despite their relatively short range. It is often a better tactic to avoid them entirely by attacking a part of the village that is not covered by them. To quickly destroy a Wizard Tower, deploy a few Giants as a distraction while Archers, Wizards or Minions take out the Wizard Tower. Deploy troops in a circle around it since this will limit its ability to take out multiple troops with splash damage. Dropping 1 Giant and surrounding the Wizard Tower with about 10 housing space of troops will generally be sufficient to destroy it.
- Wizard Towers that are on the outside of a base can be easily taken out with multiple small troops. At higher Town Hall levels, a single Balloon , Super Minion , or Rocket Balloon can be quite effective provided that no Traps or Hidden Teslas emerge.
- When initially constructed, the Wizard Tower appears to be solid gray rock in a pyramid-like shape.
- At level 2, the lower portion of the tower just barely begins to show Elixir -colored magenta crystals, much like the level 6 Walls . This can be seen if you look zoom in closely enough but can be easily missed. The shape of the rock also changes slightly.
- At level 3, the crystals become much more visible.
- At level 4, some of the gray rock higher up the tower turn into crystals, and begin spiraling around the tower.
- At level 5, the entire base of the tower is crystalline, with only the top portion of the tower remaining gray rock. The level 6 Wizard Tower has no gray rock left. The entire tower is now constructed of deep magenta crystal, resembling a gigantic level 6 Wall.
- The level 6 Wizard Tower has no gray rock left. The entire tower is now constructed of deep magenta crystal, resembling a gigantic level 6 Wall.
- At level 7, the crystal structures grow prominent upward spikes surrounding the platform, and the entire tower darkens to a dark purple, appearing very much like a giant level 7 Wall.
- At level 8, the podium on which the Wizard stands becomes far wider and more jagged. The spikes melt into the tower and it has stone pillars on each side, making eight stone pillars in all. It also has embers floating around the base, indicating a lava source beneath. The embers and the lava source may also be referred to as the Town Hall is at least level 10, its Town Hall level requirement. It is also slightly darker.
- At level 9, the stone pillars turn and join into quartz and extend throughout the perimeter of the top of the Wizard Tower.
- At level 10, a new white stone platform is erected at the top, replacing the purple crystal summit. More pillar structures have been put in place beneath to fortify and support the new platform.
- At level 11, the platform appears to be marble white with purple and golden outlines; the small gaps in the platform have been filled with purple as well. The main pillar structures turn to metal with golden decorations and golden top; and the internal structure (that was once white) turns dark fuchsia.
- At level 12, the tiling changes to a slightly cracked blue stone. The gold on all 4 supporting pillars is gone, along with the circular wall at the top as well. The ring that shows at the base of where the main pillar is visible is now darker, octagonal, and at the edge of the foundation below it. The shards at the bottom now have no gaps between them, and in between the supporting pillars is a purple slab with a V/U shaped hole in it. Along the hole, there is gold trim.
- At level 13, the spot where the supporting pillars meet with the octagonal ring are reinforced with gold, and the purple slab is now shorter along with the trim becomes a plating extending further into the hole.
- At level 14, the blue stone on the tower's top is changed to emerald green, with the gray stone pillars becoming slightly brighter, gaining a golden top, becoming slightly thicker and reinforced just below the top. The purple meander pattern is replaced by a stripe-like slab around the sides of the tower, with the base of the pillars now getting a different golden trim.
- At level 15, the green stone on the tower's top change into black stone with light blue cracks in between each of the stone tiles. The gold supporting pillars turn purplish-black and become sharper, with thin gold edges. The overall body of the tower also changes, with the base crystals becoming slightly brighter, and the tower having gray supports, along with gold stripes, gray reinforcements, and a glowing blue core.
- At level 16, the pillars are replaced with tree roots, with two small tree branches both with two leaves. the crystals at the bottom become cordovan. the platform in which the Wizard stands on is now white with gold and red wooden frames.
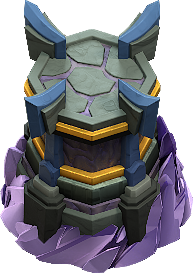
- At level 17, the tree roots of the pillars are now replaced with dark blue eagle wings which is held by thick, dark metal corner pieces at the bottom, the platform turns into a deep gray color, with the cracks being purple, and the tower no longer gets surrounded by curling roots. The base of the tower is now four-layered, with each layer increasing its size as they go downwards, with gold at the top layer, then a thick layer of dark metal, light purple crystal, and a stone layer as the bottommost part. The crystals surrounding the tower are now amethyst in color.
- Added the third Wizard Tower unlocked at Town Hall 8.
- Improved visual effects.
- Added the third Wizard Tower unlocked at Town Hall 8.
- Improved visual effects.
- Added the third Wizard Tower unlocked at Town Hall 8.
- Improved visual effects.
- You do not need to unlock or train a Wizard in order to construct a Wizard Tower. The level of your army's Wizards, if you have them, do not affect the appearance or abilities of the Wizard atop the tower.
- When you begin an upgrade on a Wizard Tower, the Wizard on the top will disappear after a few minutes and will not reappear until the tower has finished upgrading.
- While you are moving the Wizard Tower, the Wizard on the top disappears. This also happens when viewing the info screen.
- At levels 1 to 4, the Wizard Towers' fireball attacks have a somewhat slow travel time, meaning that it is possible for all troops to avoid the fireball.
- The Wizard Tower will not hold a Wizard when its health is being regenerated by the Ley Lines upon logging in following an enemy attack.
- The Wizard Tower, Walls , Cannon , Archer Tower , Mortar , and Air Defense are the oldest defenses in the game.
- Strangely, normal Wizards have a powerful attack, the while those atop the Wizard Towers have a much weaker one. They make up for this by having much greater hitpoints and a larger splash damage area than the Wizard troop.
- Both the level 13 Wizard Tower and the level 9 Bomb Tower have the same exact damage per second, being 84. However, the main difference is their attack speed, and hitpoints; the Bomb Tower only targets units on the ground while the Wizard Tower can attack aerial units as well.
- However, the main difference is their attack speed, and hitpoints; the Bomb Tower only targets units on the ground while the Wizard Tower can attack aerial units as well.
- The Wizard Tower and the Scattershot are the only defenses not to have a navy blue spike on it at a Town Hall 13 level. The Air Sweeper does not have a Town Hall 13 level at all, so it does not count.
- The Wizard and the Wizard Tower are both first unlockable in Town Hall 5.


