Bomb Tower - Clash of Clans में भवन इकाइयाँ
"Bomb Towers bombard nearby ground troops and go up in a big BOOM when destroyed! Melee units best stand clear!"
| Level | Damage per second | Damage per shot | Damage when destroyed | Hitpoints | Cost | Build time | Experience gained | Town hall level required |
|---|---|---|---|---|---|---|---|---|
| 1 | 24 | 26.4 | 150 | 650 | 700,000 | 12h | 207 | 8 |
| 2 | 28 | 30.8 | 180 | 700 | 1,000,000 | 18h | 254 | 8 |
| 3 | 32 | 35.2 | 220 | 750 | 1,300,000 | 1d | 293 | 9 |
| 4 | 40 | 44 | 260 | 850 | 1,800,000 | 1d 12h | 360 | 10 |
| 5 | 48 | 52.8 | 300 | 1,050 | 1,900,000 | 1d 18h | 388 | 11 |
| 6 | 56 | 61.6 | 350 | 1,300 | 2,000,000 | 2d | 415 | 11 |
| 7 | 64 | 70.4 | 400 | 1,600 | 4,000,000 | 3d | 509 | 12 |
| 8 | 72 | 79.2 | 450 | 1,900 | 5,000,000 | 4d | 587 | 13 |
| 9 | 84 | 92.4 | 500 | 2,300 | 6,000,000 | 4d 12h | 623 | 14 |
| 10 | 94 | 103.4 | 550 | 2,500 | 7,000,000 | 4d 18h | 640 | 15 |
| 11 | 104 | 114.4 | 600 | 2,700 | 8,500,000 | 5d | 657 | 16 |
| 12 | 114 | 125.4 | 650 | 2,900 | 14,500,000 | 9d | 881 | 17 |
| 13 | 122 | 134.2 | 700 | 3,050 | 25,000,000 | 13d | 1,059 | 18 |
Tapping this icon displays information about the Bomb Tower, such as Level, Damage Per Second, Hitpoints, Range, Damage Type and Targets.
Tapping this icon begins upgrading the Bomb Tower to the next level, if you have enough resources and a freeBuilder(orB.O.B). When the Bomb Tower is at maximum level, this icon is replaced by the Supercharge! icon.
Tapping this icon beginsSuperchargingthe maxed Bomb Tower to the next charge, if you have enough resources and a freeBuilder(orB.O.B). When the Bomb Tower is at maximum charge, this icon is not shown.
Tapping this icon instantly upgrades the Bomb Tower to the next level, at the cost of oneHammer of Buildingif you have one. When the Bomb Tower is at maximum level, or if theTown Hallrequirements for the next level are not met, this icon is not shown.
Tapping this icon, which is displayed only while an upgrade is in progress, instantly finishes that upgrade at the cost of the displayed number ofGems.
Tapping this icon, which is displayed only while an upgrade is in progress, instantly finishes that upgrade at the cost of oneBook of Building. This icon is only shown if you have at least one Book of Building.
Tapping this icon, which is displayed only while an upgrade is in progress, instantly finishes that upgrade at the cost of oneBook of Everything. This icon is only shown if you have at least one Book of Everything but do not have a Book of Building.
Tapping this icon, which is displayed only while an upgrade is in progress, gives the player the option to assign aBuilder's Apprenticeto that Building. This icon only is only shown if you have unlocked Builder's Apprentice for 500Gems.
Tapping this icon, which is displayed only while an upgrade is in progress, boosts all your Builders for 1 hour by a factor of ten, at the cost of oneBuilder Potion. This icon is only shown if you have at least one Builder Potion.
Tapping this icon, which is displayed only while an upgrade is in progress, cancels the current upgrade and refunds half of the upgrade cost.
- The Bomb Tower is a defensive building , unlocked at Town Hall level 8, that throws bombs at ground troops, dealing splash damage similarly to the Wizard Tower . However, unlike the Wizard Tower, it cannot attack air units.
- When destroyed, the bomb underneath the tower will be primed, and will explode 1 second afterwards, dealing splash damage to all ground units within 2.75 tiles of it, similar to a Giant Bomb .
- Place it where hordes of ground troops are to be expected. You can protect Air Defenses with a Bomb Tower; the two defenses complement each other, as they cover each other's weaknesses; the Bomb Tower can deal with ground troops while the Air Defense deals with air troops.
- It can be also used in place of the Wizard Tower to complement a Mortar if Wizard Towers are needed elsewhere in the base. Again, it is capable of covering most of the Mortar's blind spot, but only if they are placed next to each other.
- Due to the one second delay before the death bomb goes off, it is best to place it in an area where troops would be likely to stay for a while.
- It is best used as a core building where the bulk of troops will go. Since its bomb only goes off when it dies, it will die with all the troops in the core. Most strategies try to funnel troops into the core and defeat the base from there.
- Bomb Towers are quintessential against Witch-based armies. Starting from level 2, they can one-shot Skeletons, and having a very quick attacking speed combined with a large splash means they can hold off the Skeletons for an extremely long time. Once they get overwhelmed (either by having extremely large amounts of Skeletons or being attacked by Witches ), their bomb can destroy the Skeletons and damage the Witches.
- The defender could potentially defeat ranged troops with the Bomb Tower by exposing them into a Tornado Trap . The Tornado Trap could pull them closer to the Bomb Tower, in range of the death damage, while also dealing damage to them faster. This is quite crippling to hordes of Wizards and Bowlers .
- Bomb Towers, when upgraded to max level, can serve as a deterrent to Blizzard ( Super Wizards in a Battle Blimp ) attacks, as their damage when destroyed will instantly wipe out Super Wizards should they land on the Bomb Tower. Placing them where one thinks a Blizzard will be strongest can prevent effective value from such attacks. If the Bomb Tower is not at maximum level, the death damage will still be able to severely damage the Super Wizards if they are caught in it, though some extra damage from traps (such as a Bomb ) will be needed to finish them off. However, note that level 6 or lower Bomb Towers may be instantly destroyed by the Blimp's own death damage, triggering its death damage prematurely. The same principle can be applied against Super Archers in a Blimp, though extra damage will be required at relative level since the Super Archer has more hitpoints. However, it cannot blow up Throwers , since they have much higher hitpoints, and extra traps are needed to destroy them.
- If the Bomb Tower is not at maximum level, the death damage will still be able to severely damage the Super Wizards if they are caught in it, though some extra damage from traps (such as a Bomb ) will be needed to finish them off. However, note that level 6 or lower Bomb Towers may be instantly destroyed by the Blimp's own death damage, triggering its death damage prematurely.
- The same principle can be applied against Super Archers in a Blimp, though extra damage will be required at relative level since the Super Archer has more hitpoints.
- However, it cannot blow up Throwers , since they have much higher hitpoints, and extra traps are needed to destroy them.
- Air troops are totally immune to the Bomb Tower. All air strategies will almost be unaffected by the Bomb Tower. As the Bomb Tower is a defensive building, it will still be capable of funneling Balloons and Lava Hounds (assuming there are no Air Defenses remaining), and can possibly make them move away from your desired target, or into traps.
- As the Bomb Tower is a defensive building, it will still be capable of funneling Balloons and Lava Hounds (assuming there are no Air Defenses remaining), and can possibly make them move away from your desired target, or into traps.
- If the Bomb Tower of an enemy's base is exposed, a small number of troops can be used to take it out (due to its low hitpoints). This will reduce the amount of damage inflicted to your overall army as a result of its damage and explosion. A single Balloon or Minion is enough to take it out, due to its inability to target air troops. However, be mindful of nearby defenses that could target air troops, as well as Air Bombs .
- A single Balloon or Minion is enough to take it out, due to its inability to target air troops. However, be mindful of nearby defenses that could target air troops, as well as Air Bombs .
- To avoid having the majority of an attacking force being caught within the radius of its resulting explosion, consider deploying a tank unit ( Giant or Golem ) to soak up the damage. Avoid using melee units (such as Barbarians ) in tandem with the tank units, as they will likely be damaged by the tower too.
- When using ranged troops such as Archers or Wizards, make sure that they are spread out so that not all of them take damage from its attacks.
- Be on a look-out for empty 4x2 spaces near Bomb Towers. It may indicate the presence of double Giant Bombs , which, combined with the Bomb Tower’s explosion, will wreak havoc on hog -based armies.
- If the Barbarian King 's Barbarian Puppet has not been activated yet, never use it when the Barbarian King is engaging a Bomb Tower, unless if the attacker desperately needs it to regain health. The Bomb Tower's death damage will wipe out most, if not all, of the summoned Barbarians, once the King has destroyed the tower.
- Miners do not burrow fast enough to avoid the death damage of the Bomb Tower. So, when attacking with Miners, either destroy the Bomb Tower beforehand or place a Healing Spell to offset the damage caused after death.
- The Grand Warden 's range is long enough that he can snipe a Bomb Tower without exposing himself into damage from it.
- Freeze Spells cannot prevent nor delay the Bomb Tower's death damage from happening, so do not bother to save the troops from its death damage by casting a Freeze Spell on it. Invisibility Spells cannot save ground troops from the death damage either.
- Ice Block Spells can significantly reduce the damage done from the death bomb, but will freeze the affected units in the process.
- Diggy cannot submerge quickly enough before the death bomb detonates, so brace for impact!
- The Bomb Tower undergoes significant visual changes at all levels except level 2 and 6. When initially constructed, the Bomb Tower appears as a wooden platform supported by a wooden lattice. The pillars are all reinforced with a dark gray spiked metal base, as well as wooden guards with iron spikes protecting each base, in addition to golden chains on each pillar. The wooden platform is guarded on all sides with battlements, and there are four bombs resembling that of the level 1 and 2 Bomb on top of the tower. There is also a large bomb, resembling that of the level 1 and 2 Bomb , placed underneath the tower. At level 2, the wooden guards gain a steel plating on their perimeters. In addition to that, the walls of the battlements atop the tower are made of stone, but still retain their wooden corners. At level 3, the Bomb Tower gains a major overhaul. The corner guards are now made entirely of metal. The battlements have expanded, now covering the entirety of the platform, and are now made of dark gray metal with marble corners braced with brass plating. The gaps between the corner guards are now filled with skulls completing the perimeter. All the bombs on and under the tower are now golden, resembling those used by the level 5 Wall Breaker and level 5-6 Balloon . The black color theme and the skulls indicate that this level is unlocked at Town Hall level 9. At level 4, the spikes on the corner guards are now golden, and now are more numerous than the ones found on the level 3 Bomb Tower. In addition to that, the battlements are now red, with golden linings. The bombs used all resemble the level 5 and 6 Bomb. The red color theme and the lava at the bottom indicate that this level is unlocked at Town Hall level 10. At level 5, the corner guards are now golden with large golden spikes. The battlements are now white with golden linings, and the lava at the bottom becomes yellow, which indicate that this level is unlocked at Town Hall level 11. At level 6, the battlements become even larger, and a large golden guard is placed around the top of the structure. At level 7, the Bomb Tower's color scheme changes; the corner guards on the base become metallic gray with bolts replacing the spikes, and the guard is now blue and gray; the chains on the guard are absent, but the spikes become larger. The corners of the top of the tower are now cream-colored and golden strips connect these. The bombs have a new color scheme, now being encased in red-colored linings with red spikes with metal bumps. At level 8, the bottom guards change to a dark turquoise color with 2 metal plates with small snowy blue spikes on them. The pillars and the platform's sides are now colored snowy blue. The whole tower is slightly taller. On each corner of the railings there are yellow colored reinforcers. The platform is a normal turquoise and the bombs at the top are removed. At level 9, the bottom guards lose their spikes and change to black reinforcements with 2 golden grooves on them. The pillars, and the top of the Bomb Tower's platform turn emerald-green. The side of the platform is decorated with a golden meander pattern, with golden spikes at the edges of the building. The space on top of the building appears to expand slightly, and black, stone reinforcements are added at the corners of the tower, making it appear more castle-like. The tops of the corners are topped with golden slabs. The glow from below the bomb tower glows brighter, and the bomb gains golden armor around it, similar to a level 7-8 Bomb. At level 10, the pillars and the top of the Bomb Tower's platform are replaced with varying shades of indigo. The bomb below the tower also turns indigo. Red frames are added on each of the tower's pillars, and one is added below the top of the platform. The platform itself is surrounded by gold and indigo frames. At level 11, the battlements turn gray and gain golden spikes facing outwards at the top. The pillars and the floor of the platform are now made out of red wood. The platform now changes to red, gray and dark gray colors. At the front, a green leaf symbol is added to the tower. The bottom guards are also colored grey, but the at the top, they are replaced with golden guards with 2 spikes each on each corner. The entire tower appears to be strangled by curling tree branches with leaves. The Bomb underneath turns brown and the lava at the bottom disappears. At level 12, the Bomb Tower's appearance completely changes to a gray color with some blue and yellow on it. The battlements are now thicker, with shields at the sides with a yellow gem at the center, at the corners are navy blue eagle wing supports with a gear each, and the platform is now painted in a slate color. The pillars are now made out of stone, and at the pillar supports, the top golden plates are replaced with reinforced stone, while the rest of it are now smooth with a groove in between. The spikes are now repositioned within the center, with one spike present in each layer of the corner pillar supports, and the bomb underneath reverts to the color it was before.
- When initially constructed, the Bomb Tower appears as a wooden platform supported by a wooden lattice. The pillars are all reinforced with a dark gray spiked metal base, as well as wooden guards with iron spikes protecting each base, in addition to golden chains on each pillar. The wooden platform is guarded on all sides with battlements, and there are four bombs resembling that of the level 1 and 2 Bomb on top of the tower. There is also a large bomb, resembling that of the level 1 and 2 Bomb , placed underneath the tower.
- At level 2, the wooden guards gain a steel plating on their perimeters. In addition to that, the walls of the battlements atop the tower are made of stone, but still retain their wooden corners.
- At level 3, the Bomb Tower gains a major overhaul. The corner guards are now made entirely of metal. The battlements have expanded, now covering the entirety of the platform, and are now made of dark gray metal with marble corners braced with brass plating. The gaps between the corner guards are now filled with skulls completing the perimeter. All the bombs on and under the tower are now golden, resembling those used by the level 5 Wall Breaker and level 5-6 Balloon . The black color theme and the skulls indicate that this level is unlocked at Town Hall level 9.
- At level 4, the spikes on the corner guards are now golden, and now are more numerous than the ones found on the level 3 Bomb Tower. In addition to that, the battlements are now red, with golden linings. The bombs used all resemble the level 5 and 6 Bomb. The red color theme and the lava at the bottom indicate that this level is unlocked at Town Hall level 10.
- At level 5, the corner guards are now golden with large golden spikes. The battlements are now white with golden linings, and the lava at the bottom becomes yellow, which indicate that this level is unlocked at Town Hall level 11.
- At level 6, the battlements become even larger, and a large golden guard is placed around the top of the structure.
- At level 7, the Bomb Tower's color scheme changes; the corner guards on the base become metallic gray with bolts replacing the spikes, and the guard is now blue and gray; the chains on the guard are absent, but the spikes become larger. The corners of the top of the tower are now cream-colored and golden strips connect these. The bombs have a new color scheme, now being encased in red-colored linings with red spikes with metal bumps.
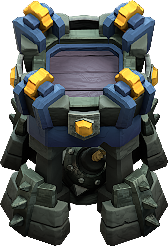
- At level 8, the bottom guards change to a dark turquoise color with 2 metal plates with small snowy blue spikes on them. The pillars and the platform's sides are now colored snowy blue. The whole tower is slightly taller. On each corner of the railings there are yellow colored reinforcers. The platform is a normal turquoise and the bombs at the top are removed.
- At level 9, the bottom guards lose their spikes and change to black reinforcements with 2 golden grooves on them. The pillars, and the top of the Bomb Tower's platform turn emerald-green. The side of the platform is decorated with a golden meander pattern, with golden spikes at the edges of the building. The space on top of the building appears to expand slightly, and black, stone reinforcements are added at the corners of the tower, making it appear more castle-like. The tops of the corners are topped with golden slabs. The glow from below the bomb tower glows brighter, and the bomb gains golden armor around it, similar to a level 7-8 Bomb.
- At level 10, the pillars and the top of the Bomb Tower's platform are replaced with varying shades of indigo. The bomb below the tower also turns indigo. Red frames are added on each of the tower's pillars, and one is added below the top of the platform. The platform itself is surrounded by gold and indigo frames.
- At level 11, the battlements turn gray and gain golden spikes facing outwards at the top. The pillars and the floor of the platform are now made out of red wood. The platform now changes to red, gray and dark gray colors. At the front, a green leaf symbol is added to the tower. The bottom guards are also colored grey, but the at the top, they are replaced with golden guards with 2 spikes each on each corner. The entire tower appears to be strangled by curling tree branches with leaves. The Bomb underneath turns brown and the lava at the bottom disappears.
- At level 12, the Bomb Tower's appearance completely changes to a gray color with some blue and yellow on it. The battlements are now thicker, with shields at the sides with a yellow gem at the center, at the corners are navy blue eagle wing supports with a gear each, and the platform is now painted in a slate color. The pillars are now made out of stone, and at the pillar supports, the top golden plates are replaced with reinforced stone, while the rest of it are now smooth with a groove in between. The spikes are now repositioned within the center, with one spike present in each layer of the corner pillar supports, and the bomb underneath reverts to the color it was before.
- The unit in the Bomb Tower appears to be a Bomber , despite the Bomber being a Builder Base-exclusive troop (and the Bomb Tower being added before the Builder Base was added). The Bomber's appearance changes with level of the Bomb Tower. At level 1, the Bomber appears to resemble that of a level 1 to 4 Bomber from the Builder Base. At level 3, the Bomber resembles a level 5 to 8 Bomber. At level 4, the Bomber resembles a level 11 to 12 Bomber.
- At level 1, the Bomber appears to resemble that of a level 1 to 4 Bomber from the Builder Base.
- At level 3, the Bomber resembles a level 5 to 8 Bomber.
- At level 4, the Bomber resembles a level 11 to 12 Bomber.
- Added the level 7 Bomb Tower.
- Increased damage per second at levels 5 and 6. Level 5: 44 -> 46 Level 6: 48 -> 52
- Level 5: 44 -> 46
- Level 6: 48 -> 52
- Added the level 7 Bomb Tower.
- Increased damage per second at levels 5 and 6. Level 5: 44 -> 46 Level 6: 48 -> 52
- Level 5: 44 -> 46
- Level 6: 48 -> 52
- Added the level 7 Bomb Tower.
- Increased damage per second at levels 5 and 6. Level 5: 44 -> 46 Level 6: 48 -> 52
- Level 5: 44 -> 46
- Level 6: 48 -> 52
- Added the level 7 Bomb Tower.
- Increased damage per second at levels 5 and 6. Level 5: 44 -> 46 Level 6: 48 -> 52
- Level 5: 44 -> 46
- Level 6: 48 -> 52
- The Skeleton atop the Bomb Tower is confirmed to be a Bomber , as stated by its description in Clash Royale.
- You are able to see lava under the level 4 Bomb Tower.
- The bombs at level 7 Bomb Tower does not resemble one of the Bomb's levels.
- The Bomb Tower's death explosion shares the same sound file as the Mortar's projectile landing sound, but is slowed down. This also applies to Giant Bomb , Lava Launcher , TH12's Electric Bomb, Ice Bomb , Poison Bomb ( TH14 , TH15 , TH16 ), and the Mega Mine .
- The Bomb Tower is the only building in the Home Village that originated from Clash Royale. It is also one of the buildings that appear in Clash Royale, along with the Cannon , Mortar, Hidden Tesla , X-Bow , Inferno Tower , and Elixir Collector .
- It is also one of the buildings that appear in Clash Royale, along with the Cannon , Mortar, Hidden Tesla , X-Bow , Inferno Tower , and Elixir Collector .
- The Bomb Tower is the only defense that does not make distinct sound effects when editing the village, as it uses the Mortar's sound effect when tapped and placed. The Eagle Artillery , while using the Cannon's sound effect when tapped, has its own unique sound effect when placed.
- With a range of 6 tiles, it is the defensive building with the shortest range in the Home Village. However, its Clan Capital version has the shortest range, with only 5 tiles (not counting the Crusher ).
- However, its Clan Capital version has the shortest range, with only 5 tiles (not counting the Crusher ).
- The Bomb Tower, Mortar and the Town Hall are the only buildings to have a skull at Town Hall 9.
- The Bomb Tower, along with the Archer Tower and the Wizard Tower are the only defenses in Home Village to have troops on the top of it. The Bomber is the only Builder Base troop to stand atop a defense in the Home Village, the Bomb Tower.
- The Bomber is the only Builder Base troop to stand atop a defense in the Home Village, the Bomb Tower.
- Along with the Cannon , Town Hall, and Builder's Hut , the Bomb Tower is one of the four buildings at Town Hall 14 to have a golden meander pattern.


