Giant Cannon - Bygningsenheter i Clash of Clans
"Nothing gets in the way of the Giant Cannon. Its mammoth-sized cannon balls push past anything and just keep going and going and going..."
| Level | Damage per second | Damage per shot | Hitpoints | Build cost | Capital hall level required | District hall level required |
|---|---|---|---|---|---|---|
| 1 | 80 | 400 | 3,700 | 10,000 | 5 | 1 |
| 2 | 90 | 450 | 3,900 | 20,000 | 6 | 2 |
| 3 | 100 | 500 | 4,100 | 40,000 | 7 | 3 |
| 4 | 110 | 550 | 4,300 | 63,000 | 8 | 4 |
| 5 | 120 | 600 | 4,500 | 105,000 | 10 | 5 |
Tapping this icon displays information about the Giant Cannon, such as Level, Damage Per Second, Hitpoints, Range, Damage Type and Targets.
Tapping this icon contributes the Capital Gold you have into upgrading the Giant Cannon to the next level. When the Giant Cannon is at maximum level, this icon is not shown.
Tapping this icon marks the building's upgrade to the next level as a priority for the Clan, pinning it as a recommended upgrade for Clan members. This icon is only shown if the upgrade is possible, is not already prioritized and if the player is Leader or a Co-leader of their Clan.
Tapping this icon stops marking the building's upgrade to the next level as a priority for the Clan. This icon is only shown if the upgrade is possible, is being prioritized and if the player is Leader or a Co-leader of their Clan.
- The Giant Cannon is a defensive building in the Clan Capital, unlocked at Capital Hall level 5.
- Just like the Giant Cannon from the Builder Base, the Giant Cannon fires large cannonballs that damage all ground units in its path. These cannonballs travel for about 12 tiles before disintegrating.
- Giant Cannons are effective at dispatching hordes of smaller units, even if they are behind cover or otherwise un-targetable. Skeletons , Barbarians and Sneaky Archers will be one-shot by the Giant Cannon, while Super Wizards will be greatly damaged and prone to being finished off by other defenses like the Multi Mortar or another Giant Cannon shot. Super Barbarians and Hog Riders will be two-shot by higher-leveled Giant Cannons (or by maxed ones), which makes them rather vulnerable as well.
- Giant Cannons can be placed to cover choke points, whether they are artificially created by Wall placements and funneling or naturally by narrow strips of land or bridges over water. This allows its cannonballs to hit as many units as possible. Aligning the Giant Cannon with the choke point, such that the cannonball covers as much of it as possible increases its effectiveness.
- The main weaknesses of the Giant Cannon are its lack of air coverage, poor single-target DPS and very slow fire rate. The first two weaknesses can be compensated for by defending the Giant Cannon with appropriate defenses (or traps). Faster firing (or more versatile) splash defenses such as the Bomb Tower can be used to cover the Giant Cannon while it is readying another shot. Owing to the slow fire rate, the Giant Cannon is very prone to being swarmed in multiple directions; it cannot quickly fend off attackers if they attack the Giant Cannon from multiple angles. Placing the Giant Cannon to cover a choke point (as above) can also help to minimize the angles at which attackers can attack the Giant Cannon from.
- Owing to the slow fire rate, the Giant Cannon is very prone to being swarmed in multiple directions; it cannot quickly fend off attackers if they attack the Giant Cannon from multiple angles. Placing the Giant Cannon to cover a choke point (as above) can also help to minimize the angles at which attackers can attack the Giant Cannon from.
- Giant Cannons are unable to target air, meaning that air units can dispatch a Giant Cannon with ease should it be undefended by anti-air defenses.
- Its nature of firing straight-line shots make it weak against attacks that occur from multiple angles. Tanking units can be used to absorb hits from the Giant Cannon while other troops can attack it from a different angle and be safe from the Giant Cannon as a result.
- A Healing Spell works well to heal up the damage caused by a Giant Cannon if the troops can survive the hit.
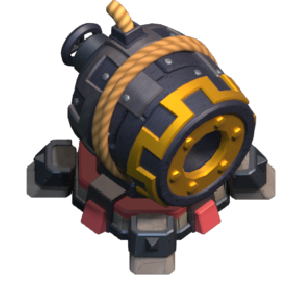
- Giant Cannons undergo significant visual changes at levels 2, 4, and 5. When initially rebuilt, it is a dark metallic barrel wound with large riveted bands. It includes a short fuse and small knob opposing the opening of the barrel. The cannon is supported by a wooden platform with four legs. At level 2, the knob is replaced with a circular dark metal. The barrel itself seems to have enlarged and made to look more keg-like, due to an added reinforcement at the center of the two metal bands surrounding it. The muzzle of the barrel gains a bronze ring. The legs of the platform change from wood to solid stone. At level 3, the inner opening of the barrel gains a thicker riveted bronze ring. The platform is now reinforced with stone and the legs gain dark metal plates and spikes. At level 4, the cannon itself grows a bit in size. A series of ropes is tied around the barrel of the cannon, in an un-orderly fashion. The fuse's place gets slightly adjusted to accommodate the ropes. At level 5, the ropes tied around the cannon are put together in order and the barrel's inner opening receives a gold trim instead of bronze. The riveted band near the barrel receives a gold pattern. The platform gets added with stone of red color to elevate the cannon (as it seems larger once again). The entire barrel along with the metal knob gets a darker paint finish.
- When initially rebuilt, it is a dark metallic barrel wound with large riveted bands. It includes a short fuse and small knob opposing the opening of the barrel. The cannon is supported by a wooden platform with four legs.
- At level 2, the knob is replaced with a circular dark metal. The barrel itself seems to have enlarged and made to look more keg-like, due to an added reinforcement at the center of the two metal bands surrounding it. The muzzle of the barrel gains a bronze ring. The legs of the platform change from wood to solid stone.
- At level 3, the inner opening of the barrel gains a thicker riveted bronze ring. The platform is now reinforced with stone and the legs gain dark metal plates and spikes.
- At level 4, the cannon itself grows a bit in size. A series of ropes is tied around the barrel of the cannon, in an un-orderly fashion. The fuse's place gets slightly adjusted to accommodate the ropes.
- At level 5, the ropes tied around the cannon are put together in order and the barrel's inner opening receives a gold trim instead of bronze. The riveted band near the barrel receives a gold pattern. The platform gets added with stone of red color to elevate the cannon (as it seems larger once again). The entire barrel along with the metal knob gets a darker paint finish.
- The Giant Cannon's damage per shot is the same as the damage dealt by a Log Trap or Mega Mine of equal level.
- Just like the Builder Base counterpart, any troops that are one-shot by the Giant Cannon will be sent flying off the battlefield, similarly to a Spring Trap .
- The Giant Cannon's damage per shot is the same as the damage dealt by a Log Trap or Mega Mine of equal level.
- Just like the Builder Base counterpart, any troops that are one-shot by the Giant Cannon will be sent flying off the battlefield, similarly to a Spring Trap .
- The Giant Cannon's damage per shot is the same as the damage dealt by a Log Trap or Mega Mine of equal level.
- Just like the Builder Base counterpart, any troops that are one-shot by the Giant Cannon will be sent flying off the battlefield, similarly to a Spring Trap .


