Mortar - Đơn vị xây dựng trong Clash of Clans
"The Mortar can mow down hordes of enemies by the splash damage from its shell. Don't let enemies get too close to it!"
| Level | Damage per second | Damage per shot | Hitpoints | Cost | Build time | Experience gained | Town hall level required |
|---|---|---|---|---|---|---|---|
| 1 | 4 | 20 | 400 | 5,000 | 30m | 42 | 3 |
| 2 | 5 | 25 | 450 | 25,000 | 1h | 60 | 4 |
| 3 | 6 | 30 | 500 | 90,000 | 2h | 84 | 5 |
| 4 | 7 | 35 | 550 | 180,000 | 3h | 103 | 6 |
| 5 | 9 | 45 | 600 | 300,000 | 6h | 146 | 7 |
| 6 | 11 | 55 | 650 | 500,000 | 8h | 169 | 8 |
| 7 | 15 | 75 | 700 | 900,000 | 12h | 207 | 9 |
| 8 | 20 | 100 | 800 | 1,200,000 | 18h | 254 | 10 |
| 9 | 25 | 125 | 950 | 1,600,000 | 20h | 268 | 11 |
| 10 | 30 | 150 | 1,100 | 1,800,000 | 1d | 293 | 11 |
| 11 | 35 | 175 | 1,300 | 2,300,000 | 1d 6h | 328 | 12 |
| 12 | 38 | 190 | 1,500 | 2,400,000 | 1d 12h | 360 | 12 |
| 13 | 42 | 210 | 1,700 | 2,800,000 | 2d | 415 | 13 |
| 14 | 48 | 240 | 1,950 | 4,300,000 | 2d 12h | 464 | 14 |
| 15 | 54 | 270 | 2,150 | 5,000,000 | 3d | 509 | 15 |
| 16 | 60 | 300 | 2,300 | 7,000,000 | 4d | 587 | 16 |
| 17 | 66 | 330 | 2,450 | 13,000,000 | 8d | 831 | 17 |
Tapping this icon displays information about the Mortar, such as Level, Damage Per Second, Hitpoints, Range, Damage Type and Targets.
Tapping this icon begins upgrading the Mortar to the next level, if you have enough resources and a freeBuilder(orB.O.B). When the Mortar is at maximum level, this icon is replaced by the Supercharge! icon.
Tapping this icon beginsSuperchargingthe maxed Mortar to the next charge, if you have enough resources and a freeBuilder(orB.O.B). When the Mortar is at maximum charge, this icon is not shown.
Tapping this icon instantly upgrades the Mortar to the next level, at the cost of oneHammer of Buildingif you have one. When the Mortar is at maximum level, or if theTown Hallrequirements for the next level are not met, this icon is not shown.
Tapping this icon, which is displayed only while an upgrade is in progress, instantly finishes that upgrade at the cost of the displayed number ofGems.
Tapping this icon, which is displayed only while an upgrade is in progress, instantly finishes that upgrade at the cost of oneBook of Building. This icon is only shown if you have at least one Book of Building.
Tapping this icon, which is displayed only while an upgrade is in progress, instantly finishes that upgrade at the cost of oneBook of Everything. This icon is only shown if you have at least one Book of Everything but do not have a Book of Building.
Tapping this icon, which is displayed only while an upgrade is in progress, gives the player the option to assign aBuilder's Apprenticeto that Building. This icon only is only shown if you have unlocked Builder's Apprentice for 500Gems.
Tapping this icon, which is displayed only while an upgrade is in progress, boosts all your Builders for 1 hour by a factor of ten, at the cost of oneBuilder Potion. This icon is only shown if you have at least one Builder Potion.
Tapping this icon, which is displayed only while an upgrade is in progress, cancels the current upgrade and refunds half of the upgrade cost.
Tapping this icon gears up the Mortar, if you have upgraded it enough to do so, have enough resources and a freeMaster Builder. If any Mortar is already geared up, this icon will not appear.
This icon informs you that the Mortar cannot be geared up because it is insufficiently upgraded. Tapping this icon will tell you the required level to gear up this Mortar. If any Mortar is already geared up, this icon will not appear.
This icon indicates that the Mortar is currently set to Normal mode, to attack units in the usual manner. Tapping this icon switches the Mortar to Burst mode. This icon only appears when the Mortar is geared up, and is in Normal mode.
This icon indicates that the Mortar is currently set to Burst mode, to attack units with burst shots. Tapping this icon switches the Mortar to Normal mode. This icon only appears when the Mortar is geared up, and is in Burst mode.
- The Mortar is the third defensive building, which is unlocked after upgrading the Town Hall to level 3 and is the first building capable of doing area damage.
- Mortars are players' light splash defenses that target ground units. Whenever an enemy comes into Range, it blasts out an explosive shell that deals area damage on impact.
- Starting at level 8, which is at Town Hall 10, the Master Builder in the Builder Base can gear up a single Mortar to make it resemble a Multi Mortar. The geared-up Mortar fires bursts of three shots, albeit with reduced damage, and it directly shoots without hesitating at first like regular Mortars. The player's Multi Mortar needs to be level 8, which is at Builder Hall 8, or higher in order to gear up your Mortar.
- The player's Multi Mortar needs to be level 8, which is at Builder Hall 8, or higher in order to gear up your Mortar.
- Mortars shoot long-range explosive shells every 5 seconds which deal devastating splash damage to every ground unit within a small radius of the impact point. Their splash damage, combined with their long-range, makes them deadly weapons against large groups of weaker enemies such as Barbarians , Archers , Goblins , and Wall Breakers . Multiple Mortars can sweep away Giants , Wizards , Hog Riders, Witches and Bowlers . The Mortar's low damage per second is due to its very slow firing speed; multiplying its DPS by 5 (its hit speed) will give you its damage per shot, which is the most important stat for Mortars. The Damage per Hit of a Mortar is quince greater than its Damage per Second.
- The Mortar's low damage per second is due to its very slow firing speed; multiplying its DPS by 5 (its hit speed) will give you its damage per shot, which is the most important stat for Mortars. The Damage per Hit of a Mortar is quince greater than its Damage per Second.
- The Mortar shell's explosion is so powerful that it knocks back smaller troops. It is possible that a troop, after getting knocked back, will change its targets depending on the current situation.
- The Mortar's major disadvantages are its inability to attack troops within its 4-tile blind spot, its low rate of fire, and low DPS which makes them less effective against high-health troops. It also cannot attack air troops, such as Balloons and Minions .
- Due to the fact that the Mortar's shell takes a while to reach its target (over a second at maximum range), fast troops like Goblins, Wall Breakers , and Hog Riders can easily dodge its attack if they are moving when the Mortar fires.
- Mortars should generally be placed towards the center of your base , preferably behind at least one set of Walls , because its long-range attacks which allow the Mortar to attack from far behind other structures. It is smart to form a triangle or square with your Mortars near the center of your base, as this allows multiple Mortars to attack the same area. Since the Mortar deals heavy splash damage, it can quite rapidly eliminate attacking light troops .
- At Town Hall 9 and above, where you get heavier defenses like the X-Bow , they are best used on the outside, protected by non-defensive buildings to pick off and clump other troops together. They can outrange the Flame Flinger (which is usable by Town Hall 12 players through Clan Castle reinforcements), so it can be an effective deterrent against them.
- At each level, the Mortar can kill a same-level Archer in a single-shot. i.e. A level 1 Mortar can one-shot level 1 Archers, level 2 can one-shot level 2 Archers, etc.
- At lower Town Hall levels, the Mortar is an extremely important defense as it will easily be able to destroy Barbarians , Archers, and Goblins. Place it near the center of your base to have as much map coverage as possible.
- Putting a Mortar and Wizard Tower together makes a smart pair because the Mortar covers a large area while the Wizard Tower helps protect the Mortar from mass air troops and covers the Mortar's blind spot. You can couple this against all types of attacks by putting the two together with an Air Defense and a storage. The storage acts as a damage sponge, while the defenses will take out hordes of troops. If your base is often attacked with Lavaloon, ( Lava Hounds + Balloons ) then separate the Air Defense from the other three. However, it is not a very good idea to place the two towers right next to each other (or separated by a single wall), because two or three appropriately leveled Lightning Spells can take them out easily. Try to put another building in between them if possible.
- If your base is often attacked with Lavaloon, ( Lava Hounds + Balloons ) then separate the Air Defense from the other three.
- However, it is not a very good idea to place the two towers right next to each other (or separated by a single wall), because two or three appropriately leveled Lightning Spells can take them out easily. Try to put another building in between them if possible.
- It is a good idea to place Mortars near each other, without putting them in the same Walls pocket (if possible). When more than one Mortars' range overlaps, it creates a kill-zone where almost no low-health troops can survive. Do not cluster the Mortars too much or troops will easily get into their blind spots and either the flying troops or spells will easily destroy all of the Mortars at once.
- Do not cluster the Mortars too much or troops will easily get into their blind spots and either the flying troops or spells will easily destroy all of the Mortars at once.
- Take care when upgrading, as many players use this as a chance to attack. For this reason, it is a good idea to only upgrade one Mortar at a time. However, upgrading all of them at once is also viable, as it gets the upgrades out of the way quickly, leaving you more time to benefit from all Mortars being online and maxed out at your current Town Hall level. This can be done when you have a Shield enabled.
- This can be done when you have a Shield enabled.
- At high levels where Mortars may be less relevant, you can place them outside your Walls, in the corners, to prevent Archers from easily sniping other non-defensive buildings. However, without additional protection, these buildings are vulnerable to Wizards or Minions , the former being able to survive a shot or two from the Mortar while the latter is invulnerable to the Mortar. They may also affect troop pathing from troops that only target defenses such as Balloons or Hog Riders . In the case of the former, one Mortar can lure an army of Balloons towards traps , wiping them out or significantly weakening them, while the latter could be lured away from the core of the base, leaving them exposed to heavier defenses for longer periods of time or leaving other troops exposed to them instead.
- They may also affect troop pathing from troops that only target defenses such as Balloons or Hog Riders . In the case of the former, one Mortar can lure an army of Balloons towards traps , wiping them out or significantly weakening them, while the latter could be lured away from the core of the base, leaving them exposed to heavier defenses for longer periods of time or leaving other troops exposed to them instead.
- The Mortar's dead zone, low rate of fire, and inability to target air troops make them vulnerable to a wide variety of different attacks. Fast melee troops such as Hog Riders or Goblins (after all resource structures are destroyed) can rush to the Mortar and quickly enter its blind spot. Unfortunately, Archers will always stop and begin firing at a Mortar before they enter its blind spot, so pairing them with a meat shield (such as a Giant ) is ideal.
- The Mortar's relatively low hitpoints make it very vulnerable to Giants and Lightning Spells. It takes only three appropriately-leveled Lightning Spells to take out any Mortar (at higher levels, two Lightning Spells may be sufficient).
- Their inability to target air troops makes Mortars easy pickings for Balloons , Dragons and Minions if they are not covered by Air Defenses and Wizard Towers .
- Beware of Mortars on the outside near Wizard Towers, as this is most likely a ploy to make troops clump together for the Wizard Towers.
- When deploying troops, try to avoid deploying low hitpoint ground troops in clumps. The Mortar does great splash damage unless a Healing Spell is in hand.
- If a building is protected only by a Mortar, using a Wizard or two can easily destroy it if you are using a ground attack.
- When initially constructed, the barrel consists of a solid black launcher tube covered with a black surface and has a foundation. There is one gimbal on each side and they are made of wood, hold down by two iron stakes near each end, the stakes have a fitting on top which hold a square iron ring, and have a stud on top and a two-step metal disk on the side. The back gimbal's stakes are made of a much darker metal similar to the barrel. At level 2, the barrel becomes larger and gets a gold ring around the muzzle. The back gimbal's stakes are made with iron, and the gimbals gain two more studs. At level 3, the entire Mortar becomes larger. The muzzle gets thicker and seemingly creates a "neck" on the barrel. The gimbals lose two studs. At level 4, the barrel becomes larger, it is covered with a more reflective metal and the foundation have a brass layer, and it sports a wider, pitted ring of gold trim around the muzzle. The gimbals gain two studs once again and the iron becomes gold. At level 5, the barrel's gold trim is now a band and no longer pitted. The gimbals loses two studs again and the outer ring on the gimbals reverts back to gray metal. At level 6, the barrel is covered entirely by gold and the bottom of the barrel gains golden plates with iron rim. The gimbals completely gold and the two studs return yet again. At level 7, the barrel is covered with a ridged black metal, it still has a golden foundation and a thicker golden band, and the muzzle is made of a very reflective metal. The gimbal is also made of black metal except outer ring of the disk and the square rings which falls outwards instead of staying straight up, it acquires a skull on the disk and a black crystal around each stake, the studs on it turns into gold spikes. A bone and a skull are laid on the ground to the left of the Mortar. At level 8, the entire Mortar becomes larger. The ridged part of the barrel is now wider and gains nine metal plates that layer over the gold band, with spikes appear on the plate over it, the neck has an indent, the muzzle is ridged, and the inner barrel glows orange. The gimbals are a somewhat trapezoid shape with a plate on each side, the golden spikes on the rim have shifted around, two on top and one each on the slanted side, the disk and the skull are replaced by five small spikes; the fitting is now placed on the gimbal's foundation and split into two. The skull decoration on the floor is also removed. At level 9, the bottom of the barrel gains another gold band and the metal plates become white stone, the spikes become bigger, and the inner barrel gains rifling. The gimbals are made of stone, the number of spikes on the rim of gimbals is reduced to three with one on each side, they are placed on a gold band on a piece white stone and shifted closer to the barrel instead of the center of the rim, as such, their base is a long rectangle; the spikes on the side become one huge spike instead of five small ones. There are two gold chains connecting the two halves of the gimbals with the square gold rings. At level 10, the barrel greatly increases in size, the rifling in the inner barrel disappears, there is lava visible inside the barrel, and the glow from the inside of the barrel becomes much more intense which made the barrel red hot even on the outside, the gold bands are replaced with a narrower and thinner metal band glowing a duller red; the white stone plating is thicker and wider but there are only six of them and the gap between plate is bigger as well, there are two spikes on the plate and they are much larger and rotated 45 degrees. The gold band on the gimbals is sifted back to the middle, the spike base is square again with the top one being bigger, the white stone piece is centered and much thicker, the outer stone layer turns into gold and the inner one turns red, and the spikes on it is bigger and also rotated 45 degrees. At level 11, the barrel is made of black metal again, no longer red hot, and is slightly taller; the white stone plates, its spikes, and the bottom metal band are now made of black metal and the plate only cover the bottom of the barrel, the gold band around the muzzle returns bolted with pentagonal bolts where the spikes were. The gimbals are now replaced with black metal with the gold band and its spikes removed, the new gold strip goes across the front and back side and has two golden fittings holding a square gold ring; each gimbal has a brownish metal piece, which is indented in the middle to be bolted by a a black metal pentagonal bolt and the thin top merges to the gold strip. The gold chains connecting the two gimbals are removed. At level 12, the bolted band around the muzzle is replaced with a spiked one, the band is narrower and only covers the bottom half of the spikes, the plates are now slanted from the middle and alternate with the spikes instead of lining up, the sank-in part is filled with gold barely thicker than the gold band and connects to it. The brownish metal piece of the gimbals gain a golden foundation with two spikes over to the side of the indent, and the bolt also changes to a golden spike. At level 13, the barrel is made of deep green metal and the muzzle is shiner, the gold band is replaced with a flat icy blue metal plate split up by four triangular deep green metal pillar, the spike is rotated 45 degrees and lowered, both the pillar and the half covered by purplish gray metal which made up the bottom of the barrel, the small reinforcing stone plates that cover the pillars has a deep green metal spike near the top. The gimbals are made of purple metal, with deep green metal reinforcing the corners and making the purple visible in the middle, the brownish metal piece is replaced with icy blue metal and the golden foundation is removed; the gold strip and square gold rings at the top and foundation are replaced with gold reinforcements, with the middle piece surrounding a piece of purplish gray metal leading down to the ground over the side with two deep green metal spikes at the bottom, the pieces to its side are T-shaped, and the foundation ones have an indent over the purple metal. At level 14, the inner barrel and the muzzle turn into gold, the glow from the inner barrel is even brighter and fully lit up until its edge, then it is covered with a layer of purplish black stone, green metal, then stone again with a triangular indent where the spike was, below it is a gold ring with a triangular protrusion there, showing the green metal layer between them; below it is fully cover with the purplish black stone including the foundation, on it is the square wave gold lining of Town Hall 14. The back of the gimbals are made with gold, then a layer of green metal, and the front is fully covered with purplish black stone; the foundation indent is filled in, the top is decorated with a flat kite-shaped pyramid, and two thin golden lining forms a 'T' on the front of the gimbals. At level 15, the barrel and its foundation is fully made of black metal once again, the inner barrel is filled with elixir glowing pink, with a narrow gold band around the muzzle, the bottom is covered with a wide band of purple metal and a silver symbol of Town Hall 15 (inverted hollow equilateral triangle). The gimbals are made of silver, with purple metal reinforcing the corners and making the silver visible in the middle; the foundation is also made of purple metal, a gold plate with triangular top is above the foundation, at the top is a black metal strip with a golden indent merging to the side which is also made of black metal and has a triangular top, and a smaller golden plate to the side. At level 16, the Mortar changes in color to red, gray, white and yellow. Its barrel now glows a green color; it now has a golden ring at its muzzle which appears to have the shape of a crown, and also another ring below it. The Mortar's foundation is now made out of gold, and the gimbals now gain some golden triangular outlines at the top, as well as curling roots on each side, and golden spikes as well. The triangular plate disappears. At level 17, the Mortar changes its appearance once again, this time to navy, yellow and gray, matching the Town Hall 17 theme. The barrel turns into navy, and its muzzle now changes into a light gray color, with both parts being reinforced by metal plates. The Mortar's foundation changes from gold to stone. The gimbals are now double-layered with yellow light in between; they are now blue and are reinforced by metal platings, replacing the curling branches. The triangular top now returns, but this time with gold on the first layer, and stone at the second.
- At level 2, the barrel becomes larger and gets a gold ring around the muzzle. The back gimbal's stakes are made with iron, and the gimbals gain two more studs.
- At level 3, the entire Mortar becomes larger. The muzzle gets thicker and seemingly creates a "neck" on the barrel. The gimbals lose two studs.
- At level 4, the barrel becomes larger, it is covered with a more reflective metal and the foundation have a brass layer, and it sports a wider, pitted ring of gold trim around the muzzle. The gimbals gain two studs once again and the iron becomes gold.
- At level 5, the barrel's gold trim is now a band and no longer pitted. The gimbals loses two studs again and the outer ring on the gimbals reverts back to gray metal.
- At level 6, the barrel is covered entirely by gold and the bottom of the barrel gains golden plates with iron rim. The gimbals completely gold and the two studs return yet again.
- At level 7, the barrel is covered with a ridged black metal, it still has a golden foundation and a thicker golden band, and the muzzle is made of a very reflective metal. The gimbal is also made of black metal except outer ring of the disk and the square rings which falls outwards instead of staying straight up, it acquires a skull on the disk and a black crystal around each stake, the studs on it turns into gold spikes. A bone and a skull are laid on the ground to the left of the Mortar.
- At level 8, the entire Mortar becomes larger. The ridged part of the barrel is now wider and gains nine metal plates that layer over the gold band, with spikes appear on the plate over it, the neck has an indent, the muzzle is ridged, and the inner barrel glows orange. The gimbals are a somewhat trapezoid shape with a plate on each side, the golden spikes on the rim have shifted around, two on top and one each on the slanted side, the disk and the skull are replaced by five small spikes; the fitting is now placed on the gimbal's foundation and split into two. The skull decoration on the floor is also removed.
- At level 9, the bottom of the barrel gains another gold band and the metal plates become white stone, the spikes become bigger, and the inner barrel gains rifling. The gimbals are made of stone, the number of spikes on the rim of gimbals is reduced to three with one on each side, they are placed on a gold band on a piece white stone and shifted closer to the barrel instead of the center of the rim, as such, their base is a long rectangle; the spikes on the side become one huge spike instead of five small ones. There are two gold chains connecting the two halves of the gimbals with the square gold rings.
- At level 10, the barrel greatly increases in size, the rifling in the inner barrel disappears, there is lava visible inside the barrel, and the glow from the inside of the barrel becomes much more intense which made the barrel red hot even on the outside, the gold bands are replaced with a narrower and thinner metal band glowing a duller red; the white stone plating is thicker and wider but there are only six of them and the gap between plate is bigger as well, there are two spikes on the plate and they are much larger and rotated 45 degrees. The gold band on the gimbals is sifted back to the middle, the spike base is square again with the top one being bigger, the white stone piece is centered and much thicker, the outer stone layer turns into gold and the inner one turns red, and the spikes on it is bigger and also rotated 45 degrees.
- At level 11, the barrel is made of black metal again, no longer red hot, and is slightly taller; the white stone plates, its spikes, and the bottom metal band are now made of black metal and the plate only cover the bottom of the barrel, the gold band around the muzzle returns bolted with pentagonal bolts where the spikes were. The gimbals are now replaced with black metal with the gold band and its spikes removed, the new gold strip goes across the front and back side and has two golden fittings holding a square gold ring; each gimbal has a brownish metal piece, which is indented in the middle to be bolted by a a black metal pentagonal bolt and the thin top merges to the gold strip. The gold chains connecting the two gimbals are removed.
- At level 12, the bolted band around the muzzle is replaced with a spiked one, the band is narrower and only covers the bottom half of the spikes, the plates are now slanted from the middle and alternate with the spikes instead of lining up, the sank-in part is filled with gold barely thicker than the gold band and connects to it. The brownish metal piece of the gimbals gain a golden foundation with two spikes over to the side of the indent, and the bolt also changes to a golden spike.
- At level 13, the barrel is made of deep green metal and the muzzle is shiner, the gold band is replaced with a flat icy blue metal plate split up by four triangular deep green metal pillar, the spike is rotated 45 degrees and lowered, both the pillar and the half covered by purplish gray metal which made up the bottom of the barrel, the small reinforcing stone plates that cover the pillars has a deep green metal spike near the top. The gimbals are made of purple metal, with deep green metal reinforcing the corners and making the purple visible in the middle, the brownish metal piece is replaced with icy blue metal and the golden foundation is removed; the gold strip and square gold rings at the top and foundation are replaced with gold reinforcements, with the middle piece surrounding a piece of purplish gray metal leading down to the ground over the side with two deep green metal spikes at the bottom, the pieces to its side are T-shaped, and the foundation ones have an indent over the purple metal.
- At level 14, the inner barrel and the muzzle turn into gold, the glow from the inner barrel is even brighter and fully lit up until its edge, then it is covered with a layer of purplish black stone, green metal, then stone again with a triangular indent where the spike was, below it is a gold ring with a triangular protrusion there, showing the green metal layer between them; below it is fully cover with the purplish black stone including the foundation, on it is the square wave gold lining of Town Hall 14. The back of the gimbals are made with gold, then a layer of green metal, and the front is fully covered with purplish black stone; the foundation indent is filled in, the top is decorated with a flat kite-shaped pyramid, and two thin golden lining forms a 'T' on the front of the gimbals.
- At level 15, the barrel and its foundation is fully made of black metal once again, the inner barrel is filled with elixir glowing pink, with a narrow gold band around the muzzle, the bottom is covered with a wide band of purple metal and a silver symbol of Town Hall 15 (inverted hollow equilateral triangle). The gimbals are made of silver, with purple metal reinforcing the corners and making the silver visible in the middle; the foundation is also made of purple metal, a gold plate with triangular top is above the foundation, at the top is a black metal strip with a golden indent merging to the side which is also made of black metal and has a triangular top, and a smaller golden plate to the side.
- At level 16, the Mortar changes in color to red, gray, white and yellow. Its barrel now glows a green color; it now has a golden ring at its muzzle which appears to have the shape of a crown, and also another ring below it. The Mortar's foundation is now made out of gold, and the gimbals now gain some golden triangular outlines at the top, as well as curling roots on each side, and golden spikes as well. The triangular plate disappears.
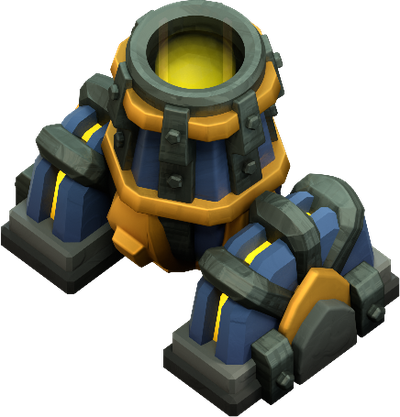
- At level 17, the Mortar changes its appearance once again, this time to navy, yellow and gray, matching the Town Hall 17 theme. The barrel turns into navy, and its muzzle now changes into a light gray color, with both parts being reinforced by metal plates. The Mortar's foundation changes from gold to stone. The gimbals are now double-layered with yellow light in between; they are now blue and are reinforced by metal platings, replacing the curling branches. The triangular top now returns, but this time with gold on the first layer, and stone at the second.
- When initially constructed, the barrel consists of a solid black launcher tube covered with a black surface and has a foundation. There is one gimbal on each side and they are made of wood, hold down by two iron stakes near each end, the stakes have a fitting on top which hold a square iron ring, and have a stud on top and a two-step metal disk on the side. The back gimbal's stakes are made of a much darker metal similar to the barrel. At level 2, the barrel becomes larger and gets a gold ring around the muzzle. The back gimbal's stakes are made with iron, and the gimbals gain two more studs. At level 3, the entire Mortar becomes larger. The muzzle gets thicker and seemingly creates a "neck" on the barrel. The gimbals lose two studs. At level 4, the barrel becomes larger, it is covered with a more reflective metal and the foundation have a brass layer, and it sports a wider, pitted ring of gold trim around the muzzle. The gimbals gain two studs once again and the iron becomes gold. At level 5, the barrel's gold trim is now a band and no longer pitted. The gimbals loses two studs again and the outer ring on the gimbals reverts back to gray metal. At level 6, the barrel is covered entirely by gold and the bottom of the barrel gains golden plates with iron rim. The gimbals completely gold and the two studs return yet again. At level 7, the barrel is covered with a ridged black metal, it still has a golden foundation and a thicker golden band, and the muzzle is made of a very reflective metal. The gimbal is also made of black metal except outer ring of the disk and the square rings which falls outwards instead of staying straight up, it acquires a skull on the disk and a black crystal around each stake, the studs on it turns into gold spikes. A bone and a skull are laid on the ground to the left of the Mortar. At level 8, the entire Mortar becomes larger. The ridged part of the barrel is now wider and gains nine metal plates that layer over the gold band, with spikes appear on the plate over it, the neck has an indent, the muzzle is ridged, and the inner barrel glows orange. The gimbals are a somewhat trapezoid shape with a plate on each side, the golden spikes on the rim have shifted around, two on top and one each on the slanted side, the disk and the skull are replaced by five small spikes; the fitting is now placed on the gimbal's foundation and split into two. The skull decoration on the floor is also removed. At level 9, the bottom of the barrel gains another gold band and the metal plates become white stone, the spikes become bigger, and the inner barrel gains rifling. The gimbals are made of stone, the number of spikes on the rim of gimbals is reduced to three with one on each side, they are placed on a gold band on a piece white stone and shifted closer to the barrel instead of the center of the rim, as such, their base is a long rectangle; the spikes on the side become one huge spike instead of five small ones. There are two gold chains connecting the two halves of the gimbals with the square gold rings. At level 10, the barrel greatly increases in size, the rifling in the inner barrel disappears, there is lava visible inside the barrel, and the glow from the inside of the barrel becomes much more intense which made the barrel red hot even on the outside, the gold bands are replaced with a narrower and thinner metal band glowing a duller red; the white stone plating is thicker and wider but there are only six of them and the gap between plate is bigger as well, there are two spikes on the plate and they are much larger and rotated 45 degrees. The gold band on the gimbals is sifted back to the middle, the spike base is square again with the top one being bigger, the white stone piece is centered and much thicker, the outer stone layer turns into gold and the inner one turns red, and the spikes on it is bigger and also rotated 45 degrees. At level 11, the barrel is made of black metal again, no longer red hot, and is slightly taller; the white stone plates, its spikes, and the bottom metal band are now made of black metal and the plate only cover the bottom of the barrel, the gold band around the muzzle returns bolted with pentagonal bolts where the spikes were. The gimbals are now replaced with black metal with the gold band and its spikes removed, the new gold strip goes across the front and back side and has two golden fittings holding a square gold ring; each gimbal has a brownish metal piece, which is indented in the middle to be bolted by a a black metal pentagonal bolt and the thin top merges to the gold strip. The gold chains connecting the two gimbals are removed. At level 12, the bolted band around the muzzle is replaced with a spiked one, the band is narrower and only covers the bottom half of the spikes, the plates are now slanted from the middle and alternate with the spikes instead of lining up, the sank-in part is filled with gold barely thicker than the gold band and connects to it. The brownish metal piece of the gimbals gain a golden foundation with two spikes over to the side of the indent, and the bolt also changes to a golden spike. At level 13, the barrel is made of deep green metal and the muzzle is shiner, the gold band is replaced with a flat icy blue metal plate split up by four triangular deep green metal pillar, the spike is rotated 45 degrees and lowered, both the pillar and the half covered by purplish gray metal which made up the bottom of the barrel, the small reinforcing stone plates that cover the pillars has a deep green metal spike near the top. The gimbals are made of purple metal, with deep green metal reinforcing the corners and making the purple visible in the middle, the brownish metal piece is replaced with icy blue metal and the golden foundation is removed; the gold strip and square gold rings at the top and foundation are replaced with gold reinforcements, with the middle piece surrounding a piece of purplish gray metal leading down to the ground over the side with two deep green metal spikes at the bottom, the pieces to its side are T-shaped, and the foundation ones have an indent over the purple metal. At level 14, the inner barrel and the muzzle turn into gold, the glow from the inner barrel is even brighter and fully lit up until its edge, then it is covered with a layer of purplish black stone, green metal, then stone again with a triangular indent where the spike was, below it is a gold ring with a triangular protrusion there, showing the green metal layer between them; below it is fully cover with the purplish black stone including the foundation, on it is the square wave gold lining of Town Hall 14. The back of the gimbals are made with gold, then a layer of green metal, and the front is fully covered with purplish black stone; the foundation indent is filled in, the top is decorated with a flat kite-shaped pyramid, and two thin golden lining forms a 'T' on the front of the gimbals. At level 15, the barrel and its foundation is fully made of black metal once again, the inner barrel is filled with elixir glowing pink, with a narrow gold band around the muzzle, the bottom is covered with a wide band of purple metal and a silver symbol of Town Hall 15 (inverted hollow equilateral triangle). The gimbals are made of silver, with purple metal reinforcing the corners and making the silver visible in the middle; the foundation is also made of purple metal, a gold plate with triangular top is above the foundation, at the top is a black metal strip with a golden indent merging to the side which is also made of black metal and has a triangular top, and a smaller golden plate to the side. At level 16, the Mortar changes in color to red, gray, white and yellow. Its barrel now glows a green color; it now has a golden ring at its muzzle which appears to have the shape of a crown, and also another ring below it. The Mortar's foundation is now made out of gold, and the gimbals now gain some golden triangular outlines at the top, as well as curling roots on each side, and golden spikes as well. The triangular plate disappears. At level 17, the Mortar changes its appearance once again, this time to navy, yellow and gray, matching the Town Hall 17 theme. The barrel turns into navy, and its muzzle now changes into a light gray color, with both parts being reinforced by metal plates. The Mortar's foundation changes from gold to stone. The gimbals are now double-layered with yellow light in between; they are now blue and are reinforced by metal platings, replacing the curling branches. The triangular top now returns, but this time with gold on the first layer, and stone at the second.
- At level 2, the barrel becomes larger and gets a gold ring around the muzzle. The back gimbal's stakes are made with iron, and the gimbals gain two more studs.
- At level 3, the entire Mortar becomes larger. The muzzle gets thicker and seemingly creates a "neck" on the barrel. The gimbals lose two studs.
- At level 4, the barrel becomes larger, it is covered with a more reflective metal and the foundation have a brass layer, and it sports a wider, pitted ring of gold trim around the muzzle. The gimbals gain two studs once again and the iron becomes gold.
- At level 5, the barrel's gold trim is now a band and no longer pitted. The gimbals loses two studs again and the outer ring on the gimbals reverts back to gray metal.
- At level 6, the barrel is covered entirely by gold and the bottom of the barrel gains golden plates with iron rim. The gimbals completely gold and the two studs return yet again.
- At level 7, the barrel is covered with a ridged black metal, it still has a golden foundation and a thicker golden band, and the muzzle is made of a very reflective metal. The gimbal is also made of black metal except outer ring of the disk and the square rings which falls outwards instead of staying straight up, it acquires a skull on the disk and a black crystal around each stake, the studs on it turns into gold spikes. A bone and a skull are laid on the ground to the left of the Mortar.
- At level 8, the entire Mortar becomes larger. The ridged part of the barrel is now wider and gains nine metal plates that layer over the gold band, with spikes appear on the plate over it, the neck has an indent, the muzzle is ridged, and the inner barrel glows orange. The gimbals are a somewhat trapezoid shape with a plate on each side, the golden spikes on the rim have shifted around, two on top and one each on the slanted side, the disk and the skull are replaced by five small spikes; the fitting is now placed on the gimbal's foundation and split into two. The skull decoration on the floor is also removed.
- At level 9, the bottom of the barrel gains another gold band and the metal plates become white stone, the spikes become bigger, and the inner barrel gains rifling. The gimbals are made of stone, the number of spikes on the rim of gimbals is reduced to three with one on each side, they are placed on a gold band on a piece white stone and shifted closer to the barrel instead of the center of the rim, as such, their base is a long rectangle; the spikes on the side become one huge spike instead of five small ones. There are two gold chains connecting the two halves of the gimbals with the square gold rings.
- At level 10, the barrel greatly increases in size, the rifling in the inner barrel disappears, there is lava visible inside the barrel, and the glow from the inside of the barrel becomes much more intense which made the barrel red hot even on the outside, the gold bands are replaced with a narrower and thinner metal band glowing a duller red; the white stone plating is thicker and wider but there are only six of them and the gap between plate is bigger as well, there are two spikes on the plate and they are much larger and rotated 45 degrees. The gold band on the gimbals is sifted back to the middle, the spike base is square again with the top one being bigger, the white stone piece is centered and much thicker, the outer stone layer turns into gold and the inner one turns red, and the spikes on it is bigger and also rotated 45 degrees.
- At level 11, the barrel is made of black metal again, no longer red hot, and is slightly taller; the white stone plates, its spikes, and the bottom metal band are now made of black metal and the plate only cover the bottom of the barrel, the gold band around the muzzle returns bolted with pentagonal bolts where the spikes were. The gimbals are now replaced with black metal with the gold band and its spikes removed, the new gold strip goes across the front and back side and has two golden fittings holding a square gold ring; each gimbal has a brownish metal piece, which is indented in the middle to be bolted by a a black metal pentagonal bolt and the thin top merges to the gold strip. The gold chains connecting the two gimbals are removed.
- At level 12, the bolted band around the muzzle is replaced with a spiked one, the band is narrower and only covers the bottom half of the spikes, the plates are now slanted from the middle and alternate with the spikes instead of lining up, the sank-in part is filled with gold barely thicker than the gold band and connects to it. The brownish metal piece of the gimbals gain a golden foundation with two spikes over to the side of the indent, and the bolt also changes to a golden spike.
- At level 13, the barrel is made of deep green metal and the muzzle is shiner, the gold band is replaced with a flat icy blue metal plate split up by four triangular deep green metal pillar, the spike is rotated 45 degrees and lowered, both the pillar and the half covered by purplish gray metal which made up the bottom of the barrel, the small reinforcing stone plates that cover the pillars has a deep green metal spike near the top. The gimbals are made of purple metal, with deep green metal reinforcing the corners and making the purple visible in the middle, the brownish metal piece is replaced with icy blue metal and the golden foundation is removed; the gold strip and square gold rings at the top and foundation are replaced with gold reinforcements, with the middle piece surrounding a piece of purplish gray metal leading down to the ground over the side with two deep green metal spikes at the bottom, the pieces to its side are T-shaped, and the foundation ones have an indent over the purple metal.
- At level 14, the inner barrel and the muzzle turn into gold, the glow from the inner barrel is even brighter and fully lit up until its edge, then it is covered with a layer of purplish black stone, green metal, then stone again with a triangular indent where the spike was, below it is a gold ring with a triangular protrusion there, showing the green metal layer between them; below it is fully cover with the purplish black stone including the foundation, on it is the square wave gold lining of Town Hall 14. The back of the gimbals are made with gold, then a layer of green metal, and the front is fully covered with purplish black stone; the foundation indent is filled in, the top is decorated with a flat kite-shaped pyramid, and two thin golden lining forms a 'T' on the front of the gimbals.
- At level 15, the barrel and its foundation is fully made of black metal once again, the inner barrel is filled with elixir glowing pink, with a narrow gold band around the muzzle, the bottom is covered with a wide band of purple metal and a silver symbol of Town Hall 15 (inverted hollow equilateral triangle). The gimbals are made of silver, with purple metal reinforcing the corners and making the silver visible in the middle; the foundation is also made of purple metal, a gold plate with triangular top is above the foundation, at the top is a black metal strip with a golden indent merging to the side which is also made of black metal and has a triangular top, and a smaller golden plate to the side.
- At level 16, the Mortar changes in color to red, gray, white and yellow. Its barrel now glows a green color; it now has a golden ring at its muzzle which appears to have the shape of a crown, and also another ring below it. The Mortar's foundation is now made out of gold, and the gimbals now gain some golden triangular outlines at the top, as well as curling roots on each side, and golden spikes as well. The triangular plate disappears.
- At level 17, the Mortar changes its appearance once again, this time to navy, yellow and gray, matching the Town Hall 17 theme. The barrel turns into navy, and its muzzle now changes into a light gray color, with both parts being reinforced by metal plates. The Mortar's foundation changes from gold to stone. The gimbals are now double-layered with yellow light in between; they are now blue and are reinforced by metal platings, replacing the curling branches. The triangular top now returns, but this time with gold on the first layer, and stone at the second.
- The appearances of the Mortar shells change at certain levels. When first constructed, the Mortar attacks by firing a single gray cubic stone shell with some dark smoke particle trailing it, dealing splash damage. At level 2 and 3, the shells become bigger. At level 4, the shells becomes black stone, its size becomes reduced a bit. At level 5, the shells become bigger again. At level 6, the shells are spherical, slightly molten as the surface have cracks of glowing liquid rock, the smoke particle turns into small explosions. The explosions when it hits the ground now glows as well. At level 8, the shells become a lot bigger, with each of the cracked surface now has a golden spike and the cracks being wider. At level 9, the shells are made of a very irregularly-shaped metal with holes and bumps on the surface. At level 10, the shells are a dodecahedron with gaps between the pentagons, each pentagon has a golden spike. At level 13, the golden spike turns into a hollow pentagonal frustum. At level 16, the pentagonal frustum is replaced with a large, metal shell with glowing yellow molten surfaces around it, with smooth cuts. The shells after hitting the ground glows for a little bit before disappearing. At level 17, the outer layer of the shell is now surrounded with much rougher, harder and darker surface.
- When first constructed, the Mortar attacks by firing a single gray cubic stone shell with some dark smoke particle trailing it, dealing splash damage.
- At level 2 and 3, the shells become bigger.
- At level 4, the shells becomes black stone, its size becomes reduced a bit.
- At level 5, the shells become bigger again.
- At level 6, the shells are spherical, slightly molten as the surface have cracks of glowing liquid rock, the smoke particle turns into small explosions. The explosions when it hits the ground now glows as well.
- At level 8, the shells become a lot bigger, with each of the cracked surface now has a golden spike and the cracks being wider.
- At level 9, the shells are made of a very irregularly-shaped metal with holes and bumps on the surface.
- At level 10, the shells are a dodecahedron with gaps between the pentagons, each pentagon has a golden spike.
- At level 13, the golden spike turns into a hollow pentagonal frustum.
- At level 16, the pentagonal frustum is replaced with a large, metal shell with glowing yellow molten surfaces around it, with smooth cuts. The shells after hitting the ground glows for a little bit before disappearing.
- At level 17, the outer layer of the shell is now surrounded with much rougher, harder and darker surface.
- Gearing up the Mortar adds two additional, identical barrels alongside the original one. However, at certain levels, they also have unique changes. At level 10, a spike on the white stone plates is removed. At level 15, the Town Hall 15 symbol is added at a different angle for the back barrel.
- At level 10, a spike on the white stone plates is removed.
- At level 15, the Town Hall 15 symbol is added at a different angle for the back barrel.
- Allowed Mortar's range to be visible even when under construction.
- Mortars now initially point away from the Town Hall in combat.
- Allowed Mortar's range to be visible even when under construction.
- Mortars now initially point away from the Town Hall in combat.
- Allowed Mortar's range to be visible even when under construction.
- Mortars now initially point away from the Town Hall in combat.
- Allowed Mortar's range to be visible even when under construction.
- Mortars now initially point away from the Town Hall in combat.
- Allowed Mortar's range to be visible even when under construction.
- Mortars now initially point away from the Town Hall in combat.
- Allowed Mortar's range to be visible even when under construction.
- Mortars now initially point away from the Town Hall in combat.
- Every time a Mortar shell impacts the ground, it shakes the ground and camera slightly (if the screen shake option is turned on in the game settings).
- Although its ammunition appears to fly before dealing damage, it cannot hit air units unlike the Scattershot .
- The Mortar's gear up is the only gear up that does not reduce its range, and also the only gear up to affect the defense's damage per shot.
- A geared up level 6 Mortar can be seen in one of the promotional photos seen from Google Play/App Store, despite the gear up only being unlocked at level 8.
- In Clash Royale, the Mortar resembles the level 5 Mortar from Clash of Clans .
- When you switch the Mortar to Burst Mode at level 10, there is an error with the spikes on the sides of each barrel. When it is facing directly upwards, the sides of the Mortar barrels will have two small spikes, identical to the single mode level 10 Mortar. When the Mortar tilts any direction other than directly upwards, the sides of the barrels will have one big spike.
- The Mortar is one of the seven defensive buildings (along with the Cannon , X-Bow , Scattershot , Monolith , Ricochet Cannon and Firespitter ) that rotate themselves to aim at different targets, as the Air Defense is made of rockets, while the others are towers. These six face away from the Town Hall when the village is not under attack.
- The Mortar, along with the Cannon, Hidden Tesla , Bomb Tower , X-Bow and Inferno Tower are the only defensive buildings that are in Clash Royale.
- The Mortar, Walls , Cannon, Archer Tower , Air Defense, and Wizard Tower are the oldest defenses in the game.
- The Mortar, Bomb Tower and the Town Hall are the only buildings to have a skull at Town Hall 9 theme.
- The Mortar, along with the Town Hall, Builder's Hut, Cannon, and Bomb Tower are the only buildings at Town Hall 14 to gain golden meander pattern.
- So far, the Mortar is the only building that can be geared up while Supercharged, and vice versa.


